Showing posts with label Christmas. Show all posts

Friday, November 27, 2020

A Bunch of Christmas Tree Cards

A Bunch of Christmas Tree Cards

Well, I made a bunch of Christmas cards today and I am so happy as is been sometimes that I did not make cards. I either made one or two cards and then stop for few months as day job workloads really taken a toll on me. I must admit that making a bunch of cards really lifted up the mood especially when you finished them all and see lots of cards in the stash box. Words just cannot express the feeling I am having right now.

Another reason I made a bunch of cards is because of the Freshly Made Sketch #463 - A Sketch by Amy shown above. The sketch is simple and most importantly, I can use up all those small, loose and leftover strips and card stocks. The sketch is easy to mass-produce.

Christmas Tree Card Set #1

I use different kinds of shapes for the sketch as I want some varieties for the cards. Thus, I die cut two pieces of white card stock from each shape. 

Christmas Tree Card Set #2

Christmas Tree Card Set #3

The different kinds of Christmas trees and sentiments are stamped onto these shaped die cuts. There are several stamp sets used here which I mix and match to cater to the shapes of the die cuts. The Christmas trees are colored using Copic markers.

Christmas Tree Card Set #4

Christmas Tree Card Set #5

As the card base is either going to be white, craft and ivory, the sides of the die cuts are contrasted by putting some distress ink to it. When the cards are assembled as in the sketch, for each design or image, there will be one as horizontal and another as vertical which gives more varieties.

Christmas Tree Card Set #6

Close-up: Christmas Tree Card Set #1, #2 and #3

Finally, some shimmers are applied to the Christmas trees and some gems and pearls are attached to the top or body of the Christmas trees and around the sentiment to give some dimensions.

Close-up: Christmas Tree Card Set #4, #5 and #6

This card is entering the challenge(s) organized by:
1) Freshly Made Sketch #463 - A Sketch by Amy (ends by 30 November 2020)


Supplies used:
Copic marker used: 0, B02, BG45, E35, E37, G07, R29, Y17, YG03, YG13, YG17, YG25 and YG67

Stamps used:
1) Fresh Squeezed Stamps Christmas Treats
2) Lawn Fawn Peace Joy Love
3) Lawn Fawn Reveal Wheel Holiday Sentiments
4) Unbranded Christmas Sentiments
5) Unbranded Variety Christmas Trees

Dies used:
1) Lawn Fawn Magic Color Slider (for the stitched oval shape)
2) My Favourite Things (MFT) Mini Album Fancy Ticket STAX Die-namics
3) 
Unbranded Stitched Circle Stackables Dies
4) Unbranded Stitched Parenthesis Stackables Dies
5) Unbranded Stitched Rectangle Stackables Dies

Sunday, December 06, 2015

Reindeer Merry Christmas Ornament

Reindeer Merry Christmas Ornament
With this Christmas ornament, I have hit my 2015 Christmas cards/projects target which is five (5) in total! Well, I know the quantity is small but at least I made my target. I will try harder next year!

I am making this Christmas ornament to be put in one of my office team Christmas tree which is on top of a her desk. I do not think it is not really the team Christmas tree as as far as I know no one sponsor for it. It is rather a personal interest to make up the festive feel in the office as we spend so many hours in office nowadays. I would like to make a small contribution to the Christmas tree as well to send my wishes to others. Thus, I made this Christmas ornament.

I guess it would be fun to make a shaker Christmas ornament as handmade things are very rare found and see in Malaysia. Thus, I guess a shaker Christmas ornament would make it more appreciated and noticeable.


Close-up: Adding shimmer before the shaker Christmas ornament is assembly
I use a digital stamp that come with both the image and sentiment which is printed and die cut into circle. Both of them are colored using Copic markers. I also outline the images with blue marker to make it pop on the white background. After coloring, I add shimmer to the reindeer's nose and the banner which really show those festive feeling!

Then, the supplies for shaker Christmas ornament are die cut and assemble accordingly. I double up the foam so that there are more rooms for the beads to move around.

This card is entering the challenge(s) organized by:
1) Just Us Girls JUGS - Word Week #322 - Merry (ends by 10 December 2015)
4) Natalie and Amy's Challenge - #39 Christmas (ends by 28 December 2015)

Supplies used:
Copic markers used: B00, E11, E13, E21, E23, E35, E37, E50 and R29

Merry Kissmoose

Merry Kissmoose
I am continuing my Christmas cards/projects target and this is another card I made today.

The moose is stamped on a white circle. A Christmas hat is added to its head to make it more Christmas feel. The images are colored using Copic markers. Then, some faux stitching are added to the edges of the circle before it is distressed to tone down the whiteness. It is attached onto a yellow scalloped circle using foam tape. Two (2) giggle eyes are added to the moose.

Close-up: The moose with Christmas hat
A snowflakes pattern paper is trimmed and attached onto a card base. Then, the scalloped circle with the moose image is attached onto the card as in sketch.

Close-up: Sentiment
The sentiment is stamped on a tiny die cut fishtail yellow banner. On the fishtail end, two (2) mistletoe leaves are stamped according to the banner end and colored using Copic marker. I decided to use red gems as the berries which add some dimension. It is attached onto the card using foam tape.

Close-up: Shimmer on the Christmas hat
The card is finished off with adding some shimmer to the white areas of the Christmas hat.

Dimension : 10.16cm x 15.24cm or 4" x 6"
Type : Vertical fold
Inlay : None

This card is entering the challenge(s) organized by:
2) Just Us Girls JUGS - Word Week #322 - Merry (ends by 10 December 2015)
5) Natalie and Amy's Challenge - #39 Christmas (ends by 28 December 2015)

Supplies used:
Copic markers used: E11, E13, E21, E23, E25, E27, E29, E33, E35, G07 and R29

Saturday, December 05, 2015

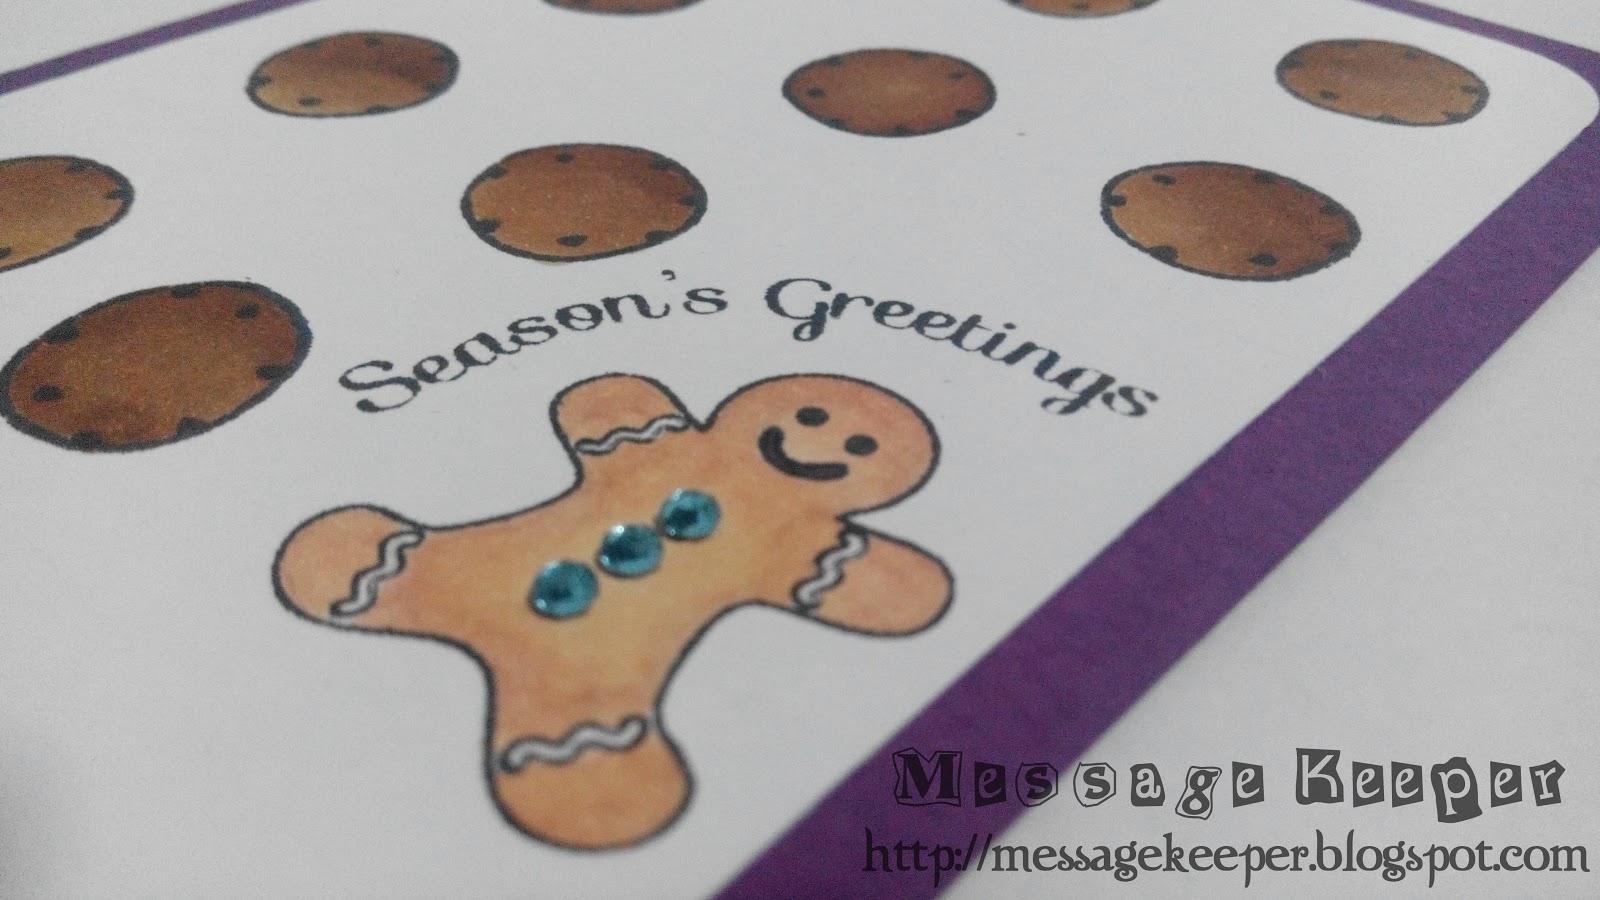
Cookies and Gingerbread Season's Greetings

Cookies and Gingerbread Season's Greetings
I am continuing my Christmas cards/projects target today which I left it hanging for a month. So far, I only have one card and one tag and my target is to have at least five (5) Christmas cards/projects. Add-on with this card, I total have three (3) Christmas cards/projects in my hands now. Hopefully I can achieve my target by this weekend! *crossing fingers*


CAS(E) This Sketch #151
For this card, I am adopting CAS(E) This Sketch #151 as shown above. With this sketch, I also got inspired by The Friday Mashup Challenge - FM236 - It's Cookie Time! whereby I use both chocolate chip cookies and gingerbread man. I just love chocolate chip cookies especially during Christmas.
Close-up: Cookies, gingerbread man and sentiment
I started off by stamping the cookies in grid and leaving two (2) empty grids to stamp the gingerbread man and the sentiment. These cookies and gingerbread man are then colored using Copic markers. I randomly color the cookies shades in different directions to reflects the reality in baking. The corners are rounded and attached onto a purple card base.

Cookies and Gingerbread Season's Greetings - Inside
As the card base is quite dark to pen down message, a layer of inlay is used. Two (2) bitten cookies are stamped on the bottom left corner and upper right corner of the inlay and colored using Copic markers. The inlay is then corner rounded and attached to the inside of the card.
Close-up: Bitten cookies in the inlay

Close-up: Blue gems as buttons
The card is finished off with adding three (3) blue gems to the gingerbread man buttons and corner rounded the card base.

Dimension : 10.16cm x 15.24cm or 4" x 6"
Type : Vertical fold
Inlay : Yes with stamped images


This card is entering the challenge(s) organized by:
1) CAS(E) This Sketch #151 (ends by 10 December 2015)
3) Just Add Ink #291 - Just Add 'C' (ends by 09 December 2015)
4) Crafty Girls Creation Challenge 10 Anything Goes (ends by 17 December 2015)
5) Natalie and Amy's Challenge - #39 Christmas (ends by 28 December 2015)

Supplies used:
Copic markers used: E11, E13, E21, E23, E35, E37 and T7

Sunday, October 18, 2015

Sweetest Wishes for the Happiest of Holidays - Candy Canes

Sweetest Wishes for the Happiest of Holidays - Candy Canes
Making another Christmas card for the coming holiday. I hope I have at least five (5) Christmas cards in my stash by mid November 2015.

Viva la Verve Sketches - October Week 3 Sketch
For this card, I am adopting Viva la Verve Sketches - October Week 3 Sketch as shown above. It is also inspired by Cute Cards Thursday Challenge 395 - Candy! whereby I will use candy cane.

Close-up: Candy canes
The candy cane is randomly stamped on a white stitched journal card whereby I masked the outer side and also the bottom for the sentiment. The outer side of the stitched journal card is outlined using Copic marker to give some focuses.

Close-up: Sentiment and fish tailed hanging banners
For the sentiment, another red stitched journal card is die cut and trimmed for the bottom as required size. The sentiment is stamped onto it and later layer onto the candy cane stitched journal card. Some blue fish tailed banners are attached to the bottom of the stitched journal card as shown in sketch. The stitched journal card is attached onto a light green card base using slightly smaller than the stitched journal card size foam and double sized tape.

Close-up: Holly ivy on the mini doily
Two (2) holly leaves are stamped onto a small white circle and colored using Copic markers. Three (3) red gems are used as ivy. Some faux stitching are added to the circle. The circle is layer onto a green mini doily using foam tape. The mini doily is attached onto the card as in sketch.

Close-up: Glitters on the candy canes and holly leaves
The card is finished off by applying some glitter onto the candy canes and holly leaves to give it some sparkles.

Dimension : 10.1cm x 15.2cm or 4" x 6"
Type : Horizontal fold
Inlay : No

This card is entering the challenge(s) organized by:
1) Viva la Verve Sketches - October Week 3 Sketch (ends by 05 November 2015)
2) Cute Cards Thursday Challenge 395 - Candy! (ends by 14 October 2015)

Supplies used:
Copic markers used: B00, G07 and YG17

Saturday, October 17, 2015

Be Merry Santa Tag

Be Merry Santa Tag
I think it is time to start on some Christmas projects or I will have nothing when comes to Christmas! For starter, I made this tag. :P

Tag You're It Challenge #32
This tag was inspired by the Tag You're It Challenge #32 as shown above.

I use digital stamp as I do not have any Santa Claus image in my collection. The Santa Claus image is printed and die cut into a tag, obviously since it is inspired by the Tag You're It Challenge. Then, it is colored using Copic markers.
Close-up: The Santa Claus
Another green tag is die cut and stamp with background stamp. This green tag is then layered behind the Santa Claus tag. The reasons being are one, to cover-up the bleed of the Copic markers and second, to give some special to the tag.
Close-up: Sentiment on the green fish tailed banner
For the sentiment, I stamp it onto a small fish tailed banner. Using the ring enforcer die, I die cut a hole onto the green banner so that the banner can be layered on top of the Santa Claus tag.

Close-up: Glitters on the Santa Claus' clothing and light bulbs
The tag is finished off with adding some glitter to the white areas of the Santa Claus' clothing and the light bulbs. I also try to outline the image as suggested by Kathy Racoosin on her blog here and it really makes a difference. The image is more focus and pop! Finally, a red and green checked ribbon is tied to the tag's hole.

This card is entering the challenge(s) organized by:
1) Tag You're It Challenge #32 (ends by 21 October 2015)

Supplies used:
Copic markers used: B00, B04, E21, R29, R35, R46, T7, YG13 and YR16

Saturday, December 20, 2014

Merry Kissmoose Door Hanger

Merry Kissmoose Door Hanger
Well, to have that Christmas feeling is not enough by just one door hanger, right? So, I made another Christmas door hanger for my son's room. This time, I made a little cuter and more kiddy look since my son is just three (3) years plus old. 


Close-up: Moose with Christmas hat

The moose is stamped on a white circle. A Christmas hat is added to its head to make it more Christmas feel. The images are colored using Copic markers. Then, the edges of the circle is distressed to tone down the whiteness. It is attached onto a yellow scalloped circle. Two (2) giggle eyes are added to the moose and one white gem is added to the hat to make it a bit sparkle.


Close-up: Sentiment
The sentiment is stamped on a tiny die cut fishtail yellow banner but on the reverse direction from the previous. The mistletoe is created using the same way.

For my son's door hanger, I die cut a light blue tag and trimmed away the right side of the hanging hole. The scalloped circle is attached to the door hanger follow by the sentiment banner in which I use foam tape too so that it will have some dimension.

This door hanger is entering the challenge(s) organized by :
1) Lawnscaping Challenge 96 - Merry Christmas (ends by 24 December 2014)
2) Crazy for CAS - Challenge #60 Anything Goes (ends by 02 January 2015)

Stamps and tools used :
Copic marker used : E08, E13, E25, E27, E29 and R27

Wishing You a Merry Christmas Door Hanger

Wishing You a Merry Christmas Door Hanger
Although I am not celebrating Christmas, I like the Christmas feel in my house. That feeling is lacking in my house now. Thus, to have that feeling, I made a Christmas door hanger for my daughter's room. I bet she will like it when she wakes up tomorrow morning.


Close-up: Image
I use Socking Santa Ornament from Bugaboo Digi Stamp (which is freebies for December 2014) for this door hanger. After it is printed and die cut onto a circle, it is colored using Copic markers. Then, the edges of the circle is distressed with ink to tone down the whiteness. It is attached onto a green scalloped circle.


Close-up: Sentiment
The sentiment is stamped on a tiny die cut fishtail yellow banner. On the fishtail end, two (2) mistletoe leaves are stamped according to the banner end and colored using Copic marker. I decided to use red gems as the berries which add some dimension and a tiny sparkle.

I use the Papertrey Ink (PTI) Wine Bottle Tag Die (that I bought some time ago) to make into a door hanger. Finally, my theory is proven after eight (8) months of having this Papertrey Ink (PTI) Wine Bottle Tag Die on hands! The wine bottle tag can be easily turned into a door hanger by trimming away the left or right side of the hanging hole!

For my daughter's door hanger, I die cut an orange tag and trimmed away the left side of the hanging hole. The scalloped circle is attached to the door hanger follow by the sentiment banner in which I use foam tape so that it will have some dimension.

This door hanger is entering the challenge(s) organized by :
1) Lawnscaping Challenge 96 - Merry Christmas (ends by 24 December 2014)

Stamps and tools used :
Copic marker used : B05, E21, E50, E53, G17, R24, R27, R29, YG06 and YR15


Thursday, December 18, 2014

Merry Christmas

Merry Christmas
I feel guilty that I have not make any Christmas card this year. Thus, I made one today. Furthermore, most of the challenges theme are Christmas related.

On a piece of white card stock, the hanging lights are stamped randomly to create a own made pattern paper or background. Then, the light bulbs are colored with various Copic markers. The finish background is then trimmed to size and attached onto a red card base as in sketch. At the bottom of the background, it is attached with a piece of leftover Christmas theme pattern paper.

Close-up: Fishtail banner with sentiment
On a piece of card stock, it is trimmed into a fishtail banner as in sketch. The sentiment is stamped at the upper part of the banner before it is distressed with ink give it ore festive feel. It is attached onto the card as in sketch.

Close-up: Santa's hat
Finally, on a die cut circle, a Santa's hat is stamped and colored using Copic marker. I apply a thin layer of glossy accent to the furry areas of the hat and sprinkle some glitter powder onto it. It create some texture and also a shinny look! As finishing touch, I added some faux stitching to the circle using glitter silver pen. It is attached onto the card as in the sketch using foam tape.

Dimension : 10.16cm x 15.24cm or 4" x 6"
Type : Vertical fold
Inlay : None

This card is entering the challenge(s) organized by :
2) Lawnscaping Challenge 96 - Merry Christmas (ends by 24 December 2014)

Stamps and tools used :
Copic marker used : B05, R29, YG03, YR15 and V04


Thursday, December 11, 2014

Wishing You a Warm & Wonderful Christmas Tags

Wishing You a Warm & Wonderful Christmas Tags
Made these tags for my colleague's kids whose I promised early of the year that I will make a Christmas card for her as she likes my works. Frankly speaking, I really do not have much time to make cards this year due to my day job. Thus, I will take one of the Christmas card I made last year for her instead and include these fresh made tags. I hope her kids like this Christmas tags.

Close-up: Wishing You a Warm & Wonderful Christmas Tag #1
First of all, those warm clothing images such as hat, scarf, mitten and earmuff are stamped on a piece of white card stock and colored using Copic markers. Then, they are die cut using the matching dies.

Close-up: Wishing You a Warm & Wonderful Christmas Tag #2
As for the tags, several different colors card stock are die cut. After pairing up the colors, one of the tag in the pair is stamped with a sentiment border using gold ink all over the tag. This stamped tag is later trimmed whereby the upper and bottom are the concern parts. These upper and bottom parts are punch using border punch.

Close-up: Wishing You a Warm & Wonderful Christmas Tag #3
On the other tag in the pair, the sentiment is stamped on the center of the tag. The punched upper and bottom part of the tag is attached accordingly to the other tag. Then, the tag is 'accessorizes' with the hat, scarf, mitten and earmuff using foam tape.

Close-up: Wishing You a Warm & Wonderful Christmas Tag #4
Finally, a silver ribbon is tied to the tag as finishing touch!

This card is entering the challenge(s) organized by :

Stamps and tools used :
Copic marker used : B00, B02, B05, BG23, E11, E13, E33, R20, R22, R24, RV04, V04, V09, Y17, YR02, YR07 and YR15

Sunday, December 16, 2012

Christmas Hats!

Christmas Hats!
Finally, I managed to make the second Christmas card for year 2012! Thanks to most of the challenge blogs theme which is on Christmas! Hopefully my inspirations for Christmas will keep on built up so that I can make some more Christmas cards!

Merry Monday Christmas Card Challenge #17
I adopt the the simple sketch from Merry Monday Christmas Card Challenge #17 (as shown above) since they are having this Merry Monday Christmas Card Challenge - A Year in Review Challenge - Any Past Merry Monday Sketch. However, I rotate the sketch clockwise but when I am writing this, I am thinking why not just use the sketch as it is? Well, perhaps that time I just like the circles below the card rather than on the right edge of the card. 

AnnaBelle Stamps Blog Challenge Colour AC152
I also adopt the colors from AnnaBelle Stamps Blog Challenge Colour AC152 as shown above. I seldom play color challenge but this time the colors just suitable for Christmas card. Thus, I play along.

Close-up : Christmas hat
The Christmas hat is stamped onto three (3) white circles and colored using Copic markers. Then, faux stitching border is added to the circles. The circles are layered onto some green circles accordingly.

Close-up : Snowflake in watermark effect
A red card stock is stamped randomly with snowflake using watermark ink to create tone-on-tone or watermark effect. It is then attached onto a light blue card base as in sketch.

Close-up : The sentiment
The circles of hats are attached onto the card base as in sketch accordingly. Then, the sentiment is stamped on top of the middle circle.

Dimension : 12.7cm x 19.05cm or 5" x 7.5"
Type : Vertical fold
Inlay : None

If you would like to have a similar design of these items or individual item, please fill up the custom order form here. Please do include the color or theme you prefer, purpose of the item(s) (farewell, retirement, birthday and etc) and message (if any).

This card is entering the challenge(s) organized by :
2) AnnaBelle Stamps Blog Challenge Color AC152 (ending 28 December 2012)
3) MarkerPop Coloring Challenge #12 - Deep Reds (ending 16 December 2012)

Stamps and tools used :