Showing posts with label Mini Card. Show all posts

Tuesday, October 11, 2016

Gate-Folded Thank You Mini Cards


Gate-Folded Thank You Mini Cards
Made this mini card for one of my returning Copic markers buyers. I am really appreciate for his support on my mini business!

Sketch Saturday Week #433
For this card, I am adopting Sketch Saturday Week #433 as shown above. This sketch has prompted me to make a gate-folded card which is just perfect for few challenges that call for fancy or many fold cards!

As I decided to make gate-folded mini card, the space is really limited. Thus, I opt for die cut sentiment which prompt me to make two (2) cards using both the negative and positive die cut. I only need one card but I can keep  another one for later use. 


Gate-Folded Thank You Mini Cards - mirror sketch version using negative die
First, I die cut circles from metallic card stock that have mirror effect as well from green sticker. The metallic circles will be the base in which I layer both the negative and positive die cut onto it. The 'Thank You' sentiment is die cut onto the green sticker circles. The sticker elements really helps to adhere things faster and nicely onto the metallic circles.

On a pale yellow card bases, I die cut the 'gate' to make a nice gate edges. Then, the metallic circles are adhere onto the gate as in sketch, one to the left and another to the right. One card will follow the sketch exactly and another one will be mirror of it, thus the left and right.


Gate-Folded Thank You Mini Cards - original sketch version using positive die
For little embellishment and to help the gate-folded card stay closed, I stamp two (2) birds that have one look to the front and another look to the right direction. They are colored using Copic markers and I added some pattern to their scarf using silver glitter pen, dots for the bird look to the front and stripes for the bird looking to the right. Then, they are die cut using the matching die and adhere to the card base as in sketch using dimensional dots. The birds are placed just nice to make a simple snap to hold the metallic circles in close mode.

Inside the card bases, a blue trimmed card stock is layered onto them. I also die cut another two (2) white circles to attach on top of the blue layer that coordinate its position with the metallic circles. The white circles will be like hidden message space behind the metallic circles.

Dimension : 3" x 3"
Type : Gate fold
Inlay : Yes

This card is entering the challenge(s) organized by :
1) Sketch Saturday Week #433 (ends by 15 October 2016)

Supplies used:
Copic marker used: BG05, R24 and Y19

Tuesday, June 18, 2013

I Just Shifted Recently.....

I Just Shifted Recently tri-fold announcement cards
From left to right :
First/front fold
Second fold
Center/inside fold
I made these mini 'we/I moved' announcement cards for my best friend whose is going to shift soon. She is working in Singapore and renting room. Since she is not moving house, it is not appropriate to use house as images on the card. Instead, I come up with the idea of using mushroom which is perfect for her situation! I hope she likes it!


First/Front fold
I made a horizontal trifold card. Smaller mushrooms are stamped on white card stock, colored using Copic markers and trimmed accordingly. The sentiment are stamped on the right of the first/front fold. The smaller mushrooms are attached on the left of the fold which looks like it is shifting with the help of the stamped dash curvy line between them.
Close-up : Smaller mushrooms with dash curvy line
Close-up : Custom sentiment

Second fold
The bigger mushroom with door and window is stamped on white card stock, colored using Copic markers and trimmed accordingly. It is attached onto the second fold on the right. On the left side of the fold, it is stamped with another sentiment.
Close-up : Custom sentiment
Close-up : Bigger mushroom with door and window

Center/inside fold
The center fold is attached with a computer printed blank fill-up such as name, address, effective date and contact.
Close-up : The printed blank fill-up

Dimension : 
11.68cm x 6.35cm or 4.6" x 2.5" (closed)
11.68cm x 19.05cm or 4.6" x 7.5" (fully opened)
Type : Horizontal trifold
Inlay : Not applicable

Code : WM#001 (Please click here for order form)
Price : RM1.50 per piece (excluded shipping fees)

If you would like to have a similar design of these items or individual item, please fill up the custom order form here. Please do include the color or theme you prefer, purpose of the item(s) (farewell, retirement, birthday and etc) and message (if any).

This card is entering the challenge(s) organized by :

Stamps and tools used :

Friday, February 15, 2013

Lantern Mini Cards


I am so happy that Emily Leiphart hosts this Chinese New Year Blog Hop together with some of the stamp brands! It is very rare that the biggest craft community in the Western know about the Chinese New Year! I am so touched when I know about this Chinese New Year Blog Hop. 

I decided to play along with this Chinese New Year Blog Hop mainly because I am celebrating Chinese New Year! Secondly, I get to win some prizes (if I am lucky and hopefully the Year of Snake is kind to me)!

Most of the sponsors offer free digital images that you can use to enter the blog hop challenge. When I saw cherry blossoms and lanterns digital image from Fresh Squeezed Stamps, I just could not think that this image is good for Mid-Autumn Festival (also know as Mooncake Festival) as well! Thus, I decided to make two (2) 3x3 mini cards from this image with one themed Chinese New Year and another one themed Mid-Autumn Festival.

Chinese New Year Theme (CNY#001)
Here is the mini card themed Chinese New Year. The lanterns are colored in red as usually the lanterns for Chinese New Year are red. Some gold lining is added to the lanterns to give some shimmering look as well to imitate the light from within the lanterns. Gold is mostly used during Chinese New Year to symbolize fortune. Usually during Chinese New Year, the cherry or plum blossoms are used to symbolize luckiness. Thus, I add some look alike cherry or plum blossoms to the branches.
Close-up : The look alike cherry or plum blossoms

Mid-Autumn Festival Theme (MAF#001)
Here is the second mini card themed Mid-Autumn Festival. The lanterns are colored in different colors as the lanterns during Mid-Autumn Festival are colorful. Some yellow shading is added to the surrounding side of the lanterns to imitate the light from within the lanterns. As Mid-Autumn Festival is usually after harvest season, some of yellow gems are added to the branches since there would not be any flowers blooming. I made a similar Mid-Autumn Festival mini card back in 2010 using stamping. Well with this digital image from Fresh Squeezed Stamps, this year Mid-Autumn Festival cards are a lot more easier to mass produce!
Close-up : Yellow gems on the branches

I am just so happy and excited that I able to play along with Emily Leiphart's Chinese New Year Blog Hop! Hope that Emily will continue to host this Chinese New Year Blog Hop next year and years to come! 

GONG XI FA CAI (Congratulations and be prosperous)! 
May the Year of Snake brings luck, prosperity and happiness!

Dimension : 7.62cm x 7.62cm or 3" x 3"
Type : Vertical fold
Inlay : Yes
Code : 
CNY#001 - Chinese New Year Theme (Please click here for order form)
MAF#001 - Mid-Autumn Festival Theme (Please click here for order form)
Price : RM2.00 per piece (excluded shipping fees)

If you would like to have a similar design of these items or individual item, please fill up the custom order form here. Please do include the color or theme you prefer, purpose of the item(s) (farewell, retirement, birthday and etc) and message (if any).

This card is entering the challenge(s) organized by :
1) Chinese New Year Blog Hop (ending 15 February 2013)
2) CASology - Week #31 -Red (ending 17 February 2013)

Stamps and tools used :

Friday, November 16, 2012

Leafy Thanks So Much

Leafy Thanks So Much
There are a lot of inspirations on my mind these few days. I guess it has something to do with the challenges themes that the challenges blogs had for this week! Thus, I made another simple and clean card for some challenges to go with the flow! :P

CAS(E) This Sketch Challenge #6
This time, I play with CAS(E) This Sketch Challenge #6 as shown above. As this challenge blog named, I just need to keep my card clean and simple (CAS) which I been doing a few these days and I am loving it!

Close-up : Self-made leafy pattern paper
On a yellow card stock, a masked circle is placed near the bottom left corner where the sentiment would be stamped later. A leafy branch is used to stamp randomly onto the yellow card stock to create self-made pattern paper. The four (4) corners are rounded and distressed on the edges.

Close-up : The sentiment
The sentiment is stamped onto the masked circle with black ink. A cream card base is rounded at four (4) corners. Then a blue strip that has been punched with some border design on both end are attached onto the cream card base as in sketch. The yellow card is attached on top of it as in sketch.

Clean, simple and easy to produce!

Dimension : 11.43cm x 8.89 cm or 4.5" x 3.5"
Type : Horizontal fold
Inlay : None
Code : TY#005 (Please click here for order form)
Price : RM3.90 per piece (excluded shipping fees)

If you would like to have a similar design of these items or individual item, please fill up the custom order form here. Please do include the color or theme you prefer, purpose of the item(s) (farewell, retirement, birthday and etc) and message (if any).

This card is entering the challenge(s) organized by :
1) CAS(E) This Sketch Challenge #6 (ending 27 November 2012)
2) CASology - Week #19 - Thanks (ending 18 November 2012)

Stamps and tools used :

Monday, August 20, 2012

Thank You Gift Tag

Thank You Gift Tag
I come across this 10 Minute Craft Dash #1 from someone blog and find it very challenging as it required us to make a card in 10 minutes! For other card maker experts, it might be easy as they have their own craft room, varieties of supplies and inspirations. But for me, it is a big challenge as sometimes, I took days to finish a card mainly due to time constraints.

Freshly Made Sketches #48
I search for the sketch I want to adopt as I always like to start making a card with a sketch. I find Freshly Made Sketches #48 very easy to adopt as I do want to make something easy. Furthermore, I do not think my 10 minutes can make something complicated. I decided to make a simple thank you gift that can be insert into organza bag or present and easy to mass produce which Freshly Made Sketches #48 is just perfect to do so.

The rules says that I can pull out the supplies before the timer starts. Thus, I prepare my card base, pattern papers and card stock into required sizes. I feel a bit of cheating but after a short consideration, I find it good to go ahead as first, the rules did not mention cannot do like what I did. Second, I imagine how my card would be with the supplies I prepared but things not always turned to be like what I imagine.

I start my timer and work on assembling my card. By the time I finish attaching the sentiment onto the card base, it is already 9 minutes! I quickly grab my sheet of pearls and attach the pearls onto the four (4) corners of sentiment card stock. When I look at my timer, it is 10 minutes 8 seconds! Phew~! That is close!

Dimension : 6.35cm x 7.62 cm or 2.5" x 3"
Type : Horizontal fold
Inlay : None
Code : TY#002
Price : RM1.00 per piece (excluded shipping fees)

If you would like to have a similar design of these items or individual item, please e-mail us at msgkeeper@gmail.com for order. Please do include the color or theme you prefer, purpose of the item(s) (farewell, retirement, birthday and etc) and message (if any).

This card is entering the challenge(s) organized by :
1) Freshly Made Sketches #48 (ending 20 August 2012)
2) 10 Minute Craft Dash #1 - Free for All (ending 25 August 2012)

Stamps and tools used : 

Monday, August 13, 2012

Mini Square Thank You

Mini Square Thank You
Made this card for both Kim Loh and Nur Syifa, who uses Copic markers in their arts.

Card Positioning Systems (CPS) - CPS 278
The card inspirations are from The Paper Shelter Challenge #76 - Going Round and Round as well as CAS-ual Fridays CFC65 - Square Cards. The best thing is that the sketch at Card Positioning Systems (CPS) - CPS 278 as shown above is perfect to combine the earlier two (2) challenges into the sketch!


Close-up : Dotted circle in red and sentiment in the centre
It is very direct and simple card. A white card stock is trimmed into the required square measurement. Then, the dotted circle is stamped onto the white square as shown in the sketch in red ink follow by the sentiment in black ink.


Close-up : Other circles with centre purple gems surrounding the dotted circle
Another design circle stamp is used to stamp the other circles as shown in the sketch using green ink. The white square four (4) edges are cornered before distress using distress ink. The square card is mounted onto a cream card base. Some purple gems are added to the centre of the small circles.

Dimension : 10.16cm x 10.16 cm or 4" x 4"
Type : Horizontal fold
Inlay : None
Code : TY#001
Price : RM1.50 per piece (excluded shipping fees)

If you would like to have a similar design of these items or individual item, please e-mail us at msgkeeper@gmail.com for order. Please do include the color or theme you prefer, purpose of the item(s) (farewell, retirement, birthday and etc) and message (if any).

This card is entering the challenge(s) organized by :
1) Card Positioning Systems (CPS) - CPS 278 (ending 18 August 2012)
2) The Paper Shelter Challenge #76 - Going Round and Round (ending 15 August 2012)
Edit to add : This has card won The Paper Shelter Challenge #76 - Going Round and Round. Please read here or refer here.
3) CAS-ual Fridays CFC65 - Square Cards (ending 16 August 2012)

Stamps and tools used :

Sunday, July 22, 2012

Simple Invitation

Simple Invitation
I decided to make an invitation card today as I got my inspiration from Lawnscaping Challenge #38 - Inspiration Photo as shown below. The inspiration photo have some balloon, cake and decoration which gives a party feel. Furthermore, it has given me an opportunity to use a stamp set that I purchased quite sometimes ago. It has not been inked yet and I felt guilt not inky it. :P
Lawnscaping Challenge #38 - Inspiration Photo

Tuesday Morning Sketches #155
I adopt the sketch from Tuesday Morning Sketches #155 sketch/challenge as shown above due to its simplicity. The inspiration photo and sketch above plus the stamp set has given me an inspiration of a simple invitation card.

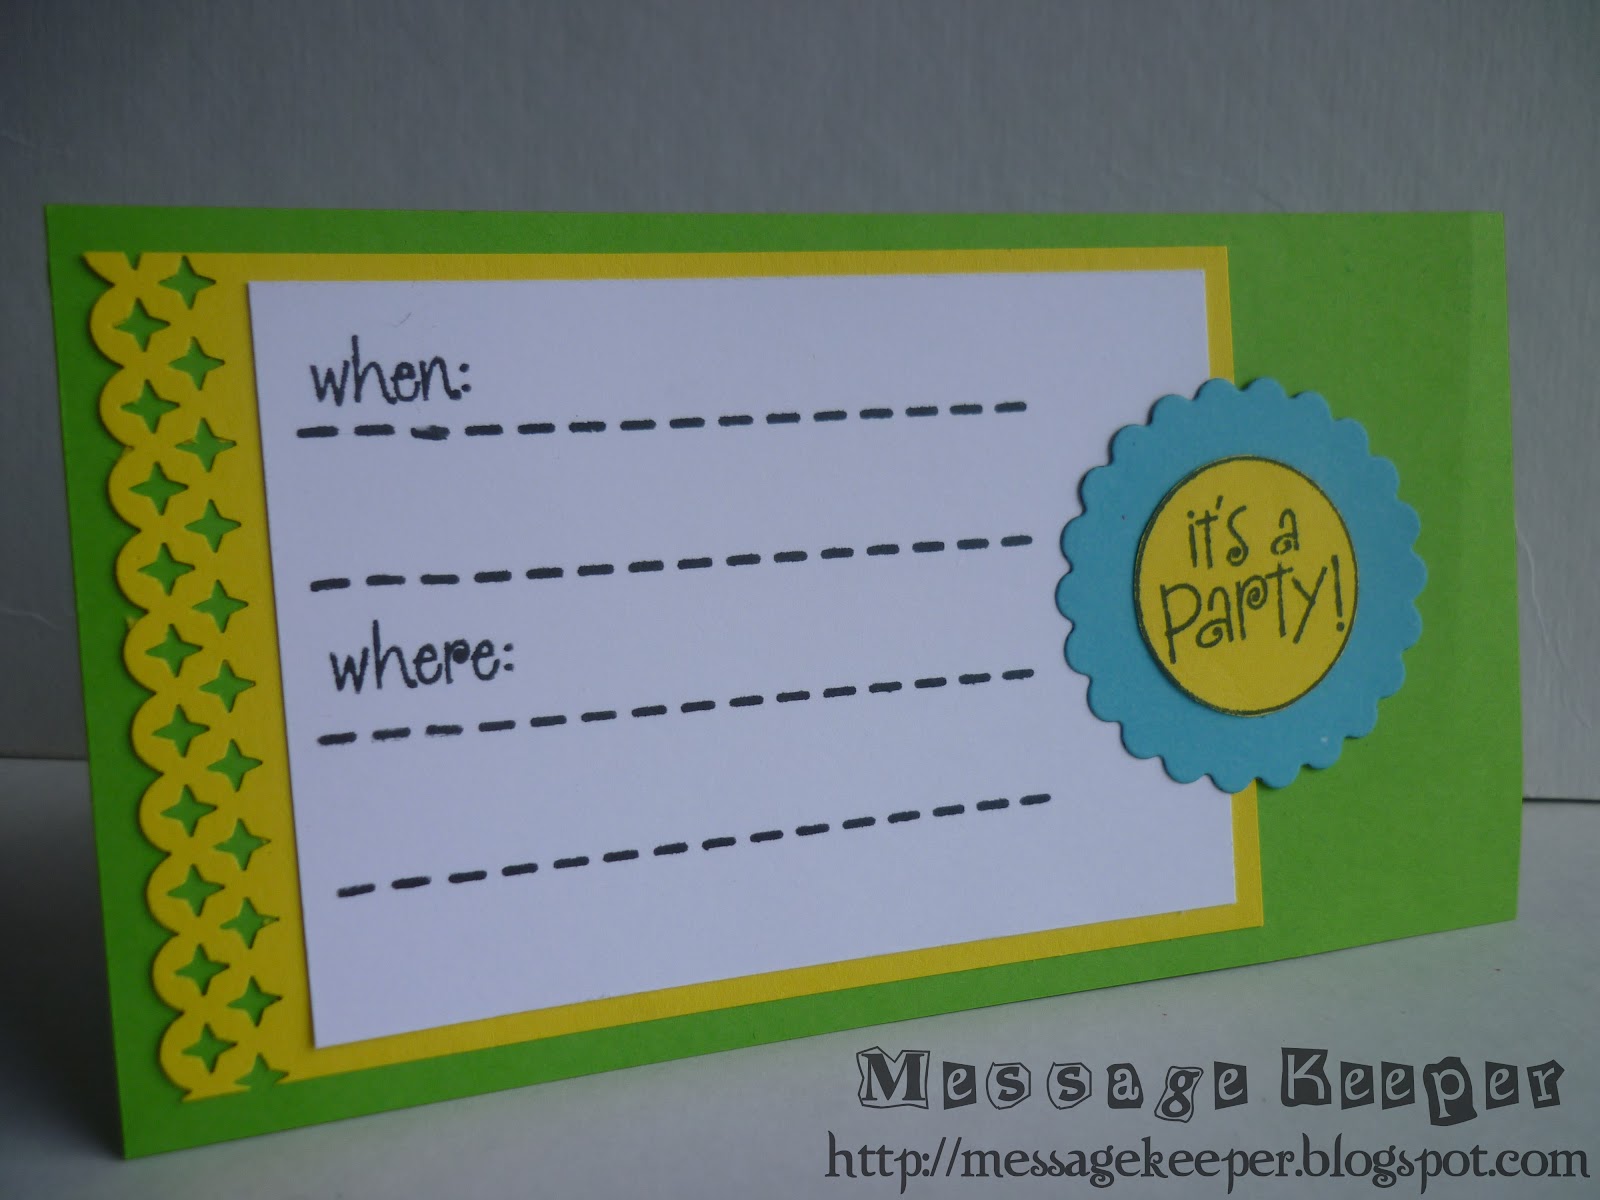
I use the dash line stamp to stamp the lines which are sketched earlier using pencil. After stamped the lines, the sketched lines are erased using eraser. I further stamp the 'when' and 'where' accordingly. Then, it is attached onto a yellow card stock which one of the edge has been punched with some design.

The yellow card stock is attached onto a green card stock which is the base of the invitation card. The sentiment, 'It's a party!' is stamped on a yellow card stock and trimmed accordingly. It is attached onto a blue scallop circle. The scallop circle is then attached onto the invitation card base as in the sketch.

It is that simple and easy to re-make.

Dimension : 7.62cm x 13.97cm or 3" x 5.5"
Type : None - One facing
Inlay : Not Applicable
Code : IN#001
Price : RM1.50 per piece (excluded shipping fees) 

If you would like to have a similar design of these items or individual item, please e-mail us at msgkeeper@gmail.com for order. Please do include the color or theme you prefer, purpose of the item(s) (farewell, retirement, birthday and etc) and message (if any).

This card is entering the challenge(s) organized by :
1) Tuesday Morning Sketches #155 (ending 23 July 2012)
2) Less is More - Week 77 - Sewing (ending 27 July 2012)

Stamps and tools used :

Friday, June 01, 2012

My Nephew Baby Announcement

Baby Boy Announcement - Front
How times files as today is my nephew, Kendryck Lau full moon (Chinese tradition of one month old baby celebration and announcement) already! According to Chinese tradition, my younger brother and sister-in-law is going to distribute red eggs to family and friends like what I did to my son last time. Well, being the crafty sister and aunty, of course I made some baby announcement cards for them to be included in the red eggs distribution.

Close-up : Wrapped baby
I decided to do a tri-folded card this time and I could not think of other colors other than blue for baby boy! So, again, the baby announcement card is based on blue hues and shades. First, I stamped the wrapped baby (I just like this baby image so much) onto a white cardstock. Below the baby image, a lovely sentiment of "We've Been Blessed With A" is stamped which my new stamp set I got few weeks ago (just nice for this occasion). I color the baby image with some Copic markers. Then, I distress the white card with Broken China. The finished card is then attached onto a front blue card.
Close-up : Sentiment

Baby Boy Announcement - Second Fold
On the second fold, it is a light blue scalloped rectangular layered on yellow scalloped circle. On the light blue scalloped rectangular, it has the sentiment, "Baby Boy" to complete the sentiment from the front which is "We've Been Blessed With A".
Close-up : Continual Sentiment Inside Second Fold

Baby Boy Announcement - Inside
Once the second fold is open, it is the announcement details. It is stamped on a white cardstock and distress with Broken China as well on the edges. A brad is used to hold the blue gingham ribbon which is tucked behind the announcement details card.
Close-up : Baby Announcement Details

Baby announcement card inserted into reg organza bag with two (2) eggs
Here is the baby announcement card which has been inserted into a red organza bag that contains two (2) red eggs (the eggs are hidden behind the card). This time, bigger organza bag is used as my mum says it would be nicer to close the opening of the organza bag that looks like flower.

Dimension : 6.86cm x 8.9cm or 2.7" x 3.5"
Type : Vertical tri-fold
Inlay : Yes with stamped sentiment and image
Code : BA#003
Price : RM2.00 per piece (excluded shipping fees) 

If you would like to have a similar design of these items or individual item, please e-mail us at msgkeeper@gmail.com for order. Please do include the color or theme you prefer, purpose of the item(s) (farewell, retirement, birthday and etc) and message (if any).

This card is entering the challenge(s) organized by :
2) Milk Coffee Challenge - Use Die Cuts  (ending 05 June 2012)
4) Pile It On #22 - Two or More Folds (ending 03 June 2012)

Stamps and tools used :

Sunday, March 04, 2012

Cutey Monsters Mini Card

Cutey Monsters Mini Card
I made this card for my newly known friend, Ishmah Aiman whom I assisted her to purchase the Ciao 24 pieces set (IB24) for her manga drawing.

Due to time constraints (thanks to my six years old daughter and three months plus son), I just manage to make a simple mini card to fit into the box of the 24 pieces Copic Ciao that I am going to post to her tomorrow. I keep it as simple as possible but wanted it to look cute too. Thus, I choose the monsters stamps.


Close-up : Tall monster on the left
I stamp the tall monster on the left side of the card so that I can stamp the shorter monster on the right. I purposely arrange them that way as I want the sentiment on top of the shorter monster. The sentiment, "Imagine, Play, Create" is suitable to use here as Aiman has a new set of markers to play with and with her imagination, I wish her could create something nice.


Close-up : Shorter monster on the right and sentiment
The bodies of the monsters, I use my stash of patterned paper and plain cardstock and pop it up using pop dots. The rest of the parts are colored using Copic markers. I finish them with some googly eyes and yellow diamonds for the aerial. I distress the edge of the white cardstock using some blue ink before attaching it on top of a yellow card base.

Dimension : 10.16cm x 10.16cm or 4" x 4"
Type : Vertical fold
Inlay : None

If you would like to have a similar design of these items or individual item, please e-mail us at msgkeeper@gmail.com for order. Please do include the color or theme you prefer, purpose of the item(s) (farewell, retirement, birthday and etc) and message (if any).

Stamps and tools used :

Thursday, December 22, 2011

My Baby Boy Announcement


Baby Boy Announcement
Left : Front
Right : Back
Today is my baby boy, Jaxzel Kew full moon (Chinese tradition of one month old baby celebration and announcement). Thus, I made some baby announcement cards to be included in the red eggs distribution.

Close-up : Front
The whole card is on blue hues and shades as it is a baby boy! First, I stamped the wrapped baby onto a white cardstock follow by the sentiment "Baby Boy" below it. I paper piece the cloth that wrap the baby and colored the baby face with Copic marker. Then, I distress the white card with Broken China and it is my first time trying distress technique! The finished product is then attached onto a light blue rectangular card.
Close-up : Wrapped baby with paper piecing and brad

Close-up : Back
The announcement details frame is stamped on a white cardstock and distress the white card with Broken China as well. The finished product is then attached onto another light blue rectangular card. Some blue circle gems are attached to the four (4) corner of the announcement details frame.
Close-up : Announcement details frame and gems

I use a brad to hold the blue ribbon which coordinate with the cloth bow that wrap the baby. Then both the front of the card (wrapped baby) and back of the card (announcement details frame) are attached to each other to hide the brad finishing.

Bags of red eggs with announcement cards
Here are the baby announcement cards which has been inserted into a red organza bag which contains two (2) red eggs (the eggs are hidden behind the card). I purposely made the baby announcement card to fit the organza bag.
Close-up : Baby announcement card inserted into reg organza bag with two (2) eggs

Dimension : 7.6cm x 8.9cm or 3" x 3.5"

If you would like to have a similar design of these items or individual item, please e-mail us at msgkeeper@gmail.com for order. Please do include the color or theme you prefer, purpose of the item(s) (farewell, retirement, birthday and etc) and message (if any).

Stamps and tools used :