Showing posts with label Papertrey Ink (PTI). Show all posts

Sunday, October 11, 2026

Sunflower Thank You Ever So Much

Sunflower Thank You Ever So Much
I still cannot help but be inspired by the colors and images in Hand Stamped Sentiments Inspiration Challenge #498 and Sunday Stamps Challenge - SSC396 Autumn Whispers, as shown below, again, especially the sunflower, even though I have just made a sunflower-themed card before, Sunflower Just Saying Hello. 

So, I decided to make another card using the colors and sunflower from these challenges' inspiration images. Instead of 'hello' and 'hi' cards, I made a 'thank you' card since they are out of stock in my stash.

For this card, I am applying Freshly Made Sketches #757 - A Sketch by Jen M, as shown above.

The sunflower image is stamped onto a white cross-stitched rectangle of cardstock and colored using the Copic markers. Then, it is trimmed to match the sketch, as shown above. Before it is pasted onto a craft cross-stitched rectangle of cardstock, the edges are distressed in brown.

Close-up: Cross-stitched rectangle with sunflower and sentiment
Two (2) small strips of dark green are attached to the top and bottom of the sunflower strip to make it more highlighted and match the card base color. The sentiment is stamped at the bottom of the craft cross-stitched rectangle of cardstock.

On a dark green card base, a yellow stripe pattern paper is attached to it, as shown in the sketch above. Then the craft cross-stitched rectangle with the sunflower image and sentiment is attached to the card base, as shown in the sketch above.

Close-up: Glitter on the sunflower petals
For finishing, the sunflower petals were added with some glitter to make them sparkle and shine.

This card is entering the challenge(s) organized by:
1) Freshly Made Sketches #757 - A Sketch by Jen M (ends by 12 October 2026)

Supplies used:
Stamp used:
1) Unbranded Sunflower (France)
2) Papertrey Ink (PTI) Boutique Borders

Dies used:
1) Unbranded Cross-Stitched Rectangles

Monday, April 04, 2022

Flower in the Mason Jar Mug Welcome Abroad

Flower in the Mason Jar Mug Welcome Abroad
One of my ex-colleague and good friend will be joining the current company I am working for. This means that we are going to be colleagues again after 11 years! In order to celebrate the occasion, I am going to make her a card to commemorate the moment.

Freshly Made Sketch #529 - A Sketch by Jen T
This time, I would like to make a mini slimline card as I have some pattern slimline envelopes that I bought some time ago. The mini slimline card would be 3.3" x 6" to be fitted into the envelope. For the sketch, I am adopting the sketch from Freshly Made Sketch #529 - A Sketch by Jen T as shown above but mirrored it.

Tic Tac Toe Challenge - TTTC155 - I choose flowers, coloring, and green
I also chose flowers, coloring, and green from Tic Tac Toe Challenge - TTTC155 for this card and flower and pattern from Just Add Ink #597 - Choose Two.

The flower in the Mason jar mug image is stamped on the white cross-stitched panel and colored using Copic markers. The edges of the panel are down-toned with some green ink.

Close-up: The leaves border
On a red card base, a dotted pattern paper is attached to the top of it. For the border edge, a leaves border dies is die-cut from green card stock. It is attached to the pattern base as in the sketch in the mirror direction.

Close-up: The sentiment on the banner
The sentiment is stamped onto a green banner and attached to the card on the left bottom using form tape.

Close-up: Shimmering flower and water
The card is finished by adding some glitter onto the main flower focal, and water to make them sparkle and shine.

This card is entering the challenge(s) organized by:
2) Try It on Tuesday - Say It With Flowers (ends by 5 April 2022)
3) Just Add Ink #597 - Choose Two - I choose flower and pattern (ends by 6 April 2022)
4) Tic Tac Toe Challenge - TTTC155 - I choose flowers, coloring, and green (ends by 7 April 2022)

Supplies used:
Stamps used:
1) Apple Blossom Fabulous Florals
2) Papertry Ink (PTI) 3024 Watercooler Talk

Dies used:
1) Unbranded Cross-Stitched Rectangles
2) Unbranded Leaves Border
3) Lawn Fawn Stitched Journaling Card

Wednesday, October 18, 2017

Zipper Card: Birthday It's Not A Matter of Counting Years....

Zipper Card: Birthday It's Not A Matter of Counting Years....
Made this card for my best friend whose birthday is tomorrow and she is in Singapore. *Aiks* My birthday card to her is always late except last year which I manage to post on time.


Sketch Saturday Week #485
For this card, I am adopting the sketch from Sketch Saturday Week #485 as shown above.

Two (2) types of different pattern papers are trim into length with two (2) and three (3) pieces of each designs. They are then attached onto a yellow card base as shown the sketch.

Close-up: The zipper with hidden message underneath
I always wanted to make a zipper card with hidden message where the recipient can peel the liner zipper to reveal the hidden message. The zipper border dies and stamp set I bought long time ago are get to get used and inked up until I saw the sketch from Sketch Saturday Week #485 which is just perfect to insert the zipper. On a red strip, the zipper border dies is used to die cut the zipper function on it. Then, the hidden message is stamped onto the card base on top of the five (5) pieces of pattern paper. The red zipper strip is attach onto the hidden message as shown in the sketch.

Close-up: The butterfly
A butterfly body is die cut from a mixed colors using block stamping technique. The intricate of the butterfly is die cut using a gold stock. Once the butterfly body and intricate has been assembled, it is attached onto the card base at the left corner. It is purposely offset to give some interests.


Close-up: The sentiment
Finally, the sentiment is stamped onto the card base together with the 'pull here' instruction.

Dimension : A2 size (4.25" x 5.5" or 10.8cm x 13.9cm)
Type : Horizontal fold
Inlay : None

This card is entering the challenge(s) organized by:
1) Sketch Saturday Week #485 (ends by 20 October 2017)
7) Not Just Cards Challenges - Anything Goes (ends by 10 November 2017)

Supplies used:

Monday, April 10, 2017

Puppy Happy for You But Sad to See You Go

Puppy Happy for You But Sad to See You Go
Made these cards for my daughter Standard Three (she is now in Standard Five) teacher who is retiring. I made two (2) cards with different images but my daughter get to choose one only. The other card will go into my cards stash and making two (2) cards at once really save a lot of my time.
Puppy Happy for You But Sad to See You Go card #1
I decided to use digital images as I am making a mini card of 3x3 inches size where it would be inserted into a gift box and I do not have much stamp images that small. Once the digital images are printed, they are colored using Copic markers. Then, they are die cut using circle dies and layered onto yellow dollies using dimension tape.
Puppy Happy for You But Sad to See You Go card #2

Close-up: Speech bubble sentiment
As for the sentiment, speech bubbles are stamped on green card stock follow by the sentiment into the speech bubbles. They are trimmed by scissor later as I do not have the matching dies.

Close-up: Puppy image on card #1
On the diagonal angle of dark purple cards base, a strip of washi tape with colorful splashes is layer onto it and the excess is trimmed. Then, the yellow dollies with stamp image is attached onto the bottom left card base using dimension tape. The speech bubble sentiment is attached on the right upper using dimension tape as well which mimic the dog speaking.
Close-up: Puppy image on card #2

Dimension : 3" x 3" 
Type : Vertical fold
Inlay : Yes

This card is entering the challenge(s) organized by:

Supplies used:
Copic markers used: E31, E55, E59, R29, Y13, Y19 and Y21

Saturday, December 17, 2016

Embossed Background Wedding Card and Tag

Embossed Background Wedding Card and Tag
Made this card and little tag for my cousin sister who is having her dinner reception for Malaysia relatives and friends tomorrow. She is married to Singaporean and had their church wedding and luncheon reception in Singapore last week. The card will be passed to her while the little tag will be inserted into the money angpau to indicate the angpau is from who.

I started off with arranging the heart images and 'love' wordings onto the acrylic block. Then, they are stamped onto watercolor paper and embossed using gold embossing powder. The same process is repeated with white embossing powder for the tag. Colors (inspiration from the wedding card invitation) are added to the embossed background.

Embossed Background Wedding Card
For the card, the sentiment is stamped onto an orange card stock and embossed using gold embossing powder. The gold embossed background is trimmed accordingly to fit the bottom and upper of the sentiment. They are layered onto the orange sentiment card stock using foam tape. Then, the whole panel is attached onto a yellow card base.
Close-up: The gold embossed sentiment on the wedding card

Embossed Background Wedding Tag
While for the tag, the sentiment is stamped onto a pink parchment stitched tag die cut using gold ink. The white embossed background is first die cut with stitched tag dies. Then, it is trimmed accordingly to fit the bottom and upper of the sentiment and layered onto the pink parchment stitched tag. Another white stitched tag is attached to the back of the pink parchment stitched tag for message writing.
Close-up: The gold embossed sentiment on the wedding tag

For finishing touch, I apply a layer of shimmer to both of the backgrounds to make them shine; after all, it is a wedding wishes card!

This card is entering the challenge(s) organized by:
2) Little Miss Muffet Challenge #153 - Anything Goes (ends by 29 December 2016) 

Supplies used:

Wednesday, September 14, 2016

Happy Birthday Cake with Flower Frame

Happy Birthday Cake with Flower Frame
My birthday cards are running low in stocks. Thus, I am making birthday card today hoping to replenish.

Tuesday Morning Sketches #369
For this birthday card, I am adopting Tuesday Morning Sketches #369 as shown above. I also adopting Deep Ocean Challenge - Challenge #137 - Bingo as shown below where I chosen pearls, flowers and lace.
Deep Ocean Challenge - Challenge #137 - Bingo

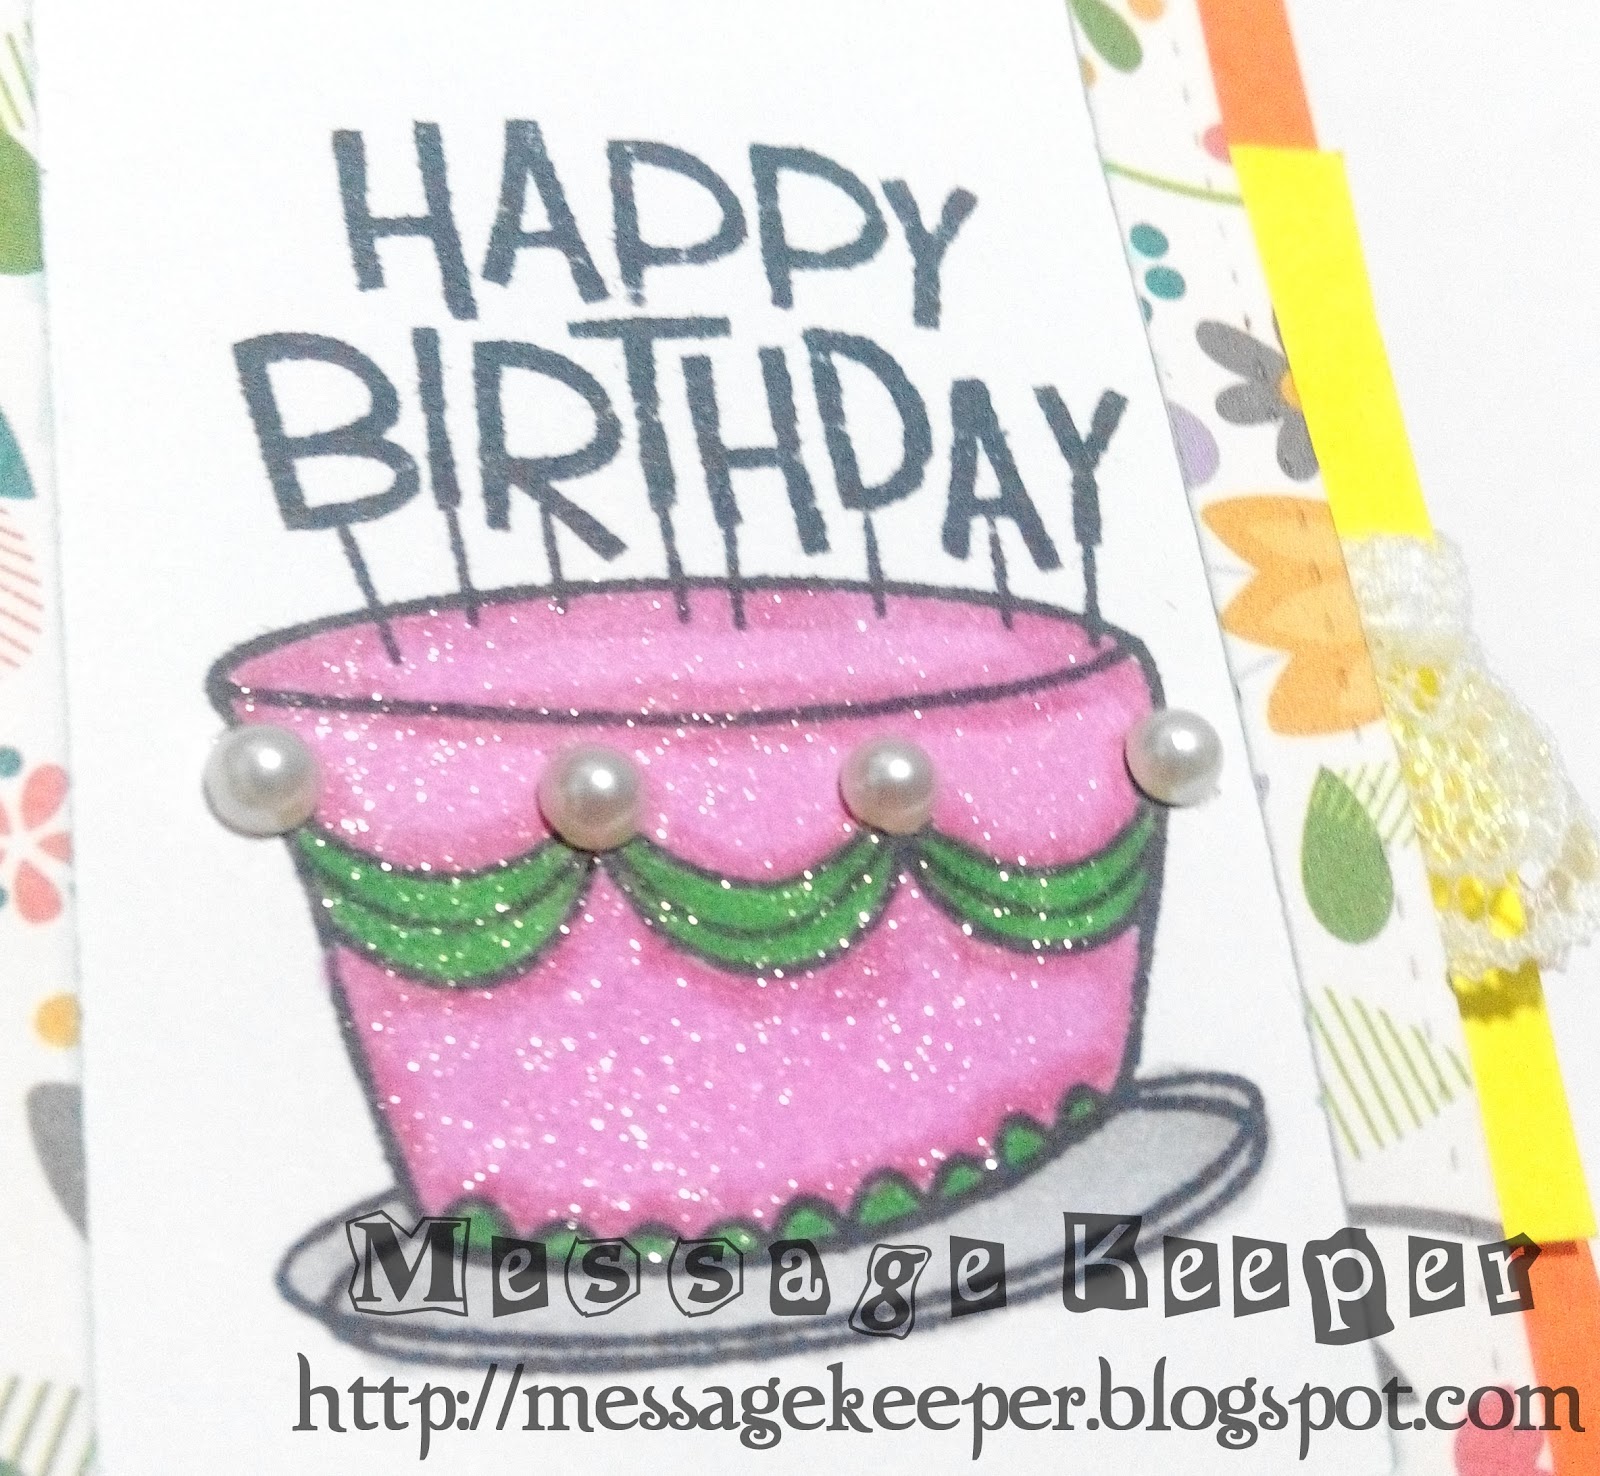
Close-up: Happy birthday cake tag with flower frame 
On a white tag, the birthday cake with sentiment is stamped and colored using Copic markers. The stitched frame is die cut onto a flower pattern paper and layer onto the white tag.

A string of lace is attached onto a yellow strip which then attached onto an orange card base using foam tape. The white tag is attached onto the card base using double foam tape as shown in the sketch.

Close-up: Shimmer and pearls on the cake
As final touch, some shimmers and four (4) white pearls are added to cake and its decoration.

Dimension : A2 card or 4.25" x 5.5"
Type : Vertical fold
Inlay : None

This card is entering the challenge(s) organized by :
1) Tuesday Morning Sketches #369 (ends by 18 September 2016)
2) Deep Ocean Challenge - Challenge #137 - Bingo (ends by 19 September 2016) - I choose pearls, flowers and lace
3) Lawnscaping Challenge 137 - Texture (ends by 14 September 2016)
4) Seize the Birthday - Frames (ends by 20 September 2016)

Supplies used:
Copic marker used: G07, N1, R85, RV63, T2 and YG67

Sunday, September 11, 2016

Owl Magnetic Bookmark

Owl Magnetic Bookmark
I just came back from Popular Bookstore's English Books RM5 Fiesta at Viva Home Shopping Mall with my family and my husband's cousin brother who came up from Singapore few days ago. He is so happy that he managed to get hold of some books that he been trying to buy. I decided to make a magnetic bookmark to gift to him as I know he do not have any. Furthermore, he really excited when I can handmade something from stamp sets and dies.

The magnetic book that I made will be similar to this bookmark whereby I will apply Jennifer Mcguire's on-the-edge die cutting technique. I find that the popping out bookmark 'header' really useful as it remind me where I stop reading as well it is cute and lovely.

Close-up: The owl
First, I stamp the owl image on white card stock and color it using Copic markers. It is then die cut using the matching dies. 

Close-up: The sentiment
On a yellow strip that is without any folding, the sentiment is stamped first. Then, I measure the half circle where it fits the owl image placement and die cut using Jennifer Mcguire's on-the-edge die cutting technique. Later, the strip is folded just where the upper half circle is cut. The folded bookmark is die cut again as I want to shape the bottom of the folded bookmark.

The result is better that the previous bookmark as there is no fold impression on the bottom half circle. I also added an extra matching layer to the back of the bookmark to make it more sturdy. The owl image is then attached onto the half circle and again an extra matching layer is applied to the back to the owl image to make it more sturdy as well.

Close-up: Shimmer on the owl flying costume and eye mask
For the final touch, some shimmer is applied to the owl flying costume and its eye mask. I also colored the word 'learning' in Copic marker, just to give it a bit of coloring in the sentiment. Finally, magnetic strips are attached to the inside of the bookmark to create a magnetic bookmark.

This card is entering the challenge(s) organized by :
1) Brown Sugar Challenge #215 - Anything Goes (ends by 15 September 2016)
2) Crafty Girls Creation Challenge 25 Anything Goes (ends by 22 September 2016)

Supplies used:
Copic markers used: B02, B04, B06, E23, E25, E27, R22, R24, R27 and Y15

Saturday, July 23, 2016

Papertrey Ink (PTI) Moments Inked: Basic Pages Die


Papertrey Ink (PTI) Moments Inked: Basic Pages Die
Papertrey Ink (PTI) Moments Inked: Basic Pages Die that has been in my wishlist has been out of stock for quite sometimes now and I have subscribed to its 'Notify Me When Product Available' button. Yet, for months I waited, there is no news or updates. Finally, in May 2016, I finally got the good news that the stock for Papertrey Ink (PTI) Moments Inked: Basic Pages Die has been re-stocked!

However, I did not order right away as during that time I am a bit busy with my day work as well on limited budget. I only decided to purchase Papertrey Ink (PTI) Moments Inked: Basic Pages Die in July 2016 as I earned a small profit from my Copic pre-order sale recently. I have a lot of ideas on how to use this Papertrey Ink (PTI) Moments Inked: Basic Pages Die other than as intended. Thus, before I lost these ideas or these ideas get tucked or cooled down somewhere in my brain, I better get this Papertrey Ink (PTI) Moments Inked: Basic Pages Die even there is no discount.

I only order Papertrey Ink (PTI) Moments Inked: Basic Pages Die on this order as there is no discount but I got to earn some points which I can use later. I do not even use the existing available points that I have as I plan to use them in Papertrey Ink (PTI) annual anniversary sale as then is the time I spend most on Papertrey Ink (PTI) products.

I checked my order status on 18 July 2016 and the parcel is shipped on 12 July 2016, the next day after my order date. As there is tracking number given, I able to track the parcel movement and within the same week after I check my order status, on Saturday, the parcel arrived.

I was in the bathroom taking my bath when the postman arrives and my dear husband is not in! Instead of me rushing out from bathroom and keeping the postman waiting, I ask my daughter to sign the acknowledgement paper. Unfortunately, she did not remember her Identification Card (IC) numbers! Luckily, the postman allow her to bring the acknowledgement paper inside to me and I signed the acknowledgement paper with wet hand in the bathroom. I told my daughter to apologize to the postman.

After all the hassle, I hope I am able to play with this Papertrey Ink (PTI) Moments Inked: Basic Pages Die soon! But first, I need to get more of the wire spring! :P

Tuesday, July 12, 2016

Boutique Border Sending Sincere Thanks

Boutique Border Sending Sincere Thanks
This is my four and last card of the day in my card making quest for my Thailand colleagues and this one is for another female colleague.

Catch the Bug Challenge Blog - Stella Says Sketch Challenge #411
For this mini card, I am adopting Catch the Bug Challenge Blog - Stella Says Sketch Challenge #411 as shown above which is perfect to integrate City Crafter Challenge Blog Week 320 - On the Border as well due to the blank space on the right of the sketch.


Close-up: The boutique border sentiment
The boutique border is die cut using watercolor paper. Then, the sentiment is stamped and embossed using white embossing powder. Distress inks are added to the surface of the boutique border to make the embossing sentiment more attractive.

A piece of pink parchment card stock is trimmed according to size and attached onto a purple card base as shown in the sketch. A white polka dots with red background is layered onto the pink parchment card stock follow by the boutique border sentiment using foam tape.


Close-up: The purple pearls in descending sizes
As final touch, three (3) sizes of purple pearls are attached onto the right bottom of the pink parchment card stock as shown in sketch.

This card is entering the challenge(s) organized by:

Supplies used:

Sunday, July 03, 2016

Happy Birthday Cake Mini Card

Happy Birthday Cake Mini Card
My daughter is going to attend a small birthday party later in the afternoon. The birthday present has been prepared and the only thing missing is a card. Thus, I quickly pull out my crafty stuffs and make a mini birthday card for her.


On a white circle, the birthday cake with sentiment is stamped and colored using Copic markers.

While on a red lunchbox note die, a pink plaid pattern paper is attached onto it and the excess the trimmed. Then, the circle birthday cake is attached on top of it using foam tape as shown the sketch.

Close-up view of the birthday cake
As final touch, four (4) white pearls are added to cake decoration. Another two (2) sets of purple pearls that contain three (3) sizes are attached onto the card on the bottom left corner and upper right corner as in sketch.

This card is entering the challenge(s) organized by:

Supplies used:
Copic markers used: E23, E37, R81, R83, R85,V06 and Y35

Sunday, June 12, 2016

Butterfly Thinking of You Now & Always

Butterfly Thinking of You Now & Always
Just made this card for fun and de-stress myself a bit. Furthermore, I found some challenges that are good and interest me to play with! ;p

Close-up: Faux messy watercolor background
First, I made a faux messy watercolor background on a white rectangular card stock using my new stamp I bought in early 2015 but yet to get it inky. Then, a pink-green plaid patter paper is trimmed and attache onto a neon pink card base follow by the faux messy watercolor background as in sketch.

Close-up: The butterfly
The butterfly is stamped on a white card stock and colored using Copic markers. It is then die cut using its matching dies. Before it is layer onto the green scallop square using dimension foam, a light blue liner is being applied so that the butterfly image is more focus. The green scallop square is later attached onto the messy watercolor background using dimension foam as well.

Close-up: The sentiment
On a green strip, the sentiment is stamped and attached onto the card base as in sketch. The angle of the sentiment is purposely off angle to emphasis on the off kilter effect. The excess from the strip is trimmed.

Close-up: Shimmer on the butterfly cells
As final touch, some shimmers are added to the cells of the butterfly, both its upper and lower wings.

Dimension: 10.1cm x 15.2cm or 4" x 6"
Type: Vertical fold
Inlay: None

This card is entering the challenge(s) organized by:
2) Lawnscaping Challenge 131 - Off Kilter! (ends by 15 June 2016)

Supplies used:
Copic markers used: B04, BV02, RV25, YG13 and YR15