Showing posts with label Tsukineko. Show all posts

Sunday, October 11, 2026

Sunflower Thank You Ever So Much

Sunflower Thank You Ever So Much
I still cannot help but be inspired by the colors and images in Hand Stamped Sentiments Inspiration Challenge #498 and Sunday Stamps Challenge - SSC396 Autumn Whispers, as shown below, again, especially the sunflower, even though I have just made a sunflower-themed card before, Sunflower Just Saying Hello. 

So, I decided to make another card using the colors and sunflower from these challenges' inspiration images. Instead of 'hello' and 'hi' cards, I made a 'thank you' card since they are out of stock in my stash.

For this card, I am applying Freshly Made Sketches #757 - A Sketch by Jen M, as shown above.

The sunflower image is stamped onto a white cross-stitched rectangle of cardstock and colored using the Copic markers. Then, it is trimmed to match the sketch, as shown above. Before it is pasted onto a craft cross-stitched rectangle of cardstock, the edges are distressed in brown.

Close-up: Cross-stitched rectangle with sunflower and sentiment
Two (2) small strips of dark green are attached to the top and bottom of the sunflower strip to make it more highlighted and match the card base color. The sentiment is stamped at the bottom of the craft cross-stitched rectangle of cardstock.

On a dark green card base, a yellow stripe pattern paper is attached to it, as shown in the sketch above. Then the craft cross-stitched rectangle with the sunflower image and sentiment is attached to the card base, as shown in the sketch above.

Close-up: Glitter on the sunflower petals
For finishing, the sunflower petals were added with some glitter to make them sparkle and shine.

This card is entering the challenge(s) organized by:
1) Freshly Made Sketches #757 - A Sketch by Jen M (ends by 12 October 2026)

Supplies used:
Stamp used:
1) Unbranded Sunflower (France)
2) Papertrey Ink (PTI) Boutique Borders

Dies used:
1) Unbranded Cross-Stitched Rectangles

Sunflower Just Saying Hello

Sunflower Just Saying Hello
Ever since the last card, Hello and Hi Stencil Background with Hi Focal, I cannot stop myself from being inspired by the colors and images in Hand Stamped Sentiments Inspiration Challenge #498, and Sunday Stamps Challenge - SSC396 Autumn Whispers, as shown below, especially the sunflower. Thus, I decided to make another card using the colors and the sunflower in these challenges' inspiration images.
Hand Stamped Sentiments Inspiration Challenge #498
Sunday Stamps Challenge - SSC396 Autumn Whispers

For these cards, I am using Jennifer McGuire's split card technique whereby one (1) image is trimmed into two (2) to make two (2) cards at once. Instead of two (2) images, I trimmed into three (3) images because of the card size, which is 2.8" x 4". I even thought about what I should make with the extra image, which has almost half of the sunflower image on it. Well, that can wait for the latter.

The 1.7" strip with half of the sunflower
The sunflower is stamped onto larger-sized watercolor cardstock so that the split card technique can be applied. After being colored using watercolors, the image is trimmed, resulting in two (2) 2.5" x 3.7" pieces and a 1.7" strip, as shown above.

The sentiment is stamped onto the cardstock, with one at the top right corner and another at the top left corner, as shown in the photo above. Then, they are attached to the yellow cross-stitched rectangle cardstock.

Close-up: Glitter on the sunflower petals
The card is finished by adding some glitter onto the petals to make them sparkle and shine.

This card is entering the challenge(s) organized by:
2) Little Red Wagon Challenge #879 - Stitches (ends by 13 October 2026)

Supplies used:
Stamp used:
1) Unbranded Sunflower
2) Hero Arts CL272 All Occasion Messages

Dies used:
1) Unbranded Cross-Stitched Rectangles

Wednesday, October 07, 2026

Fairy Hi

Fairy Hi
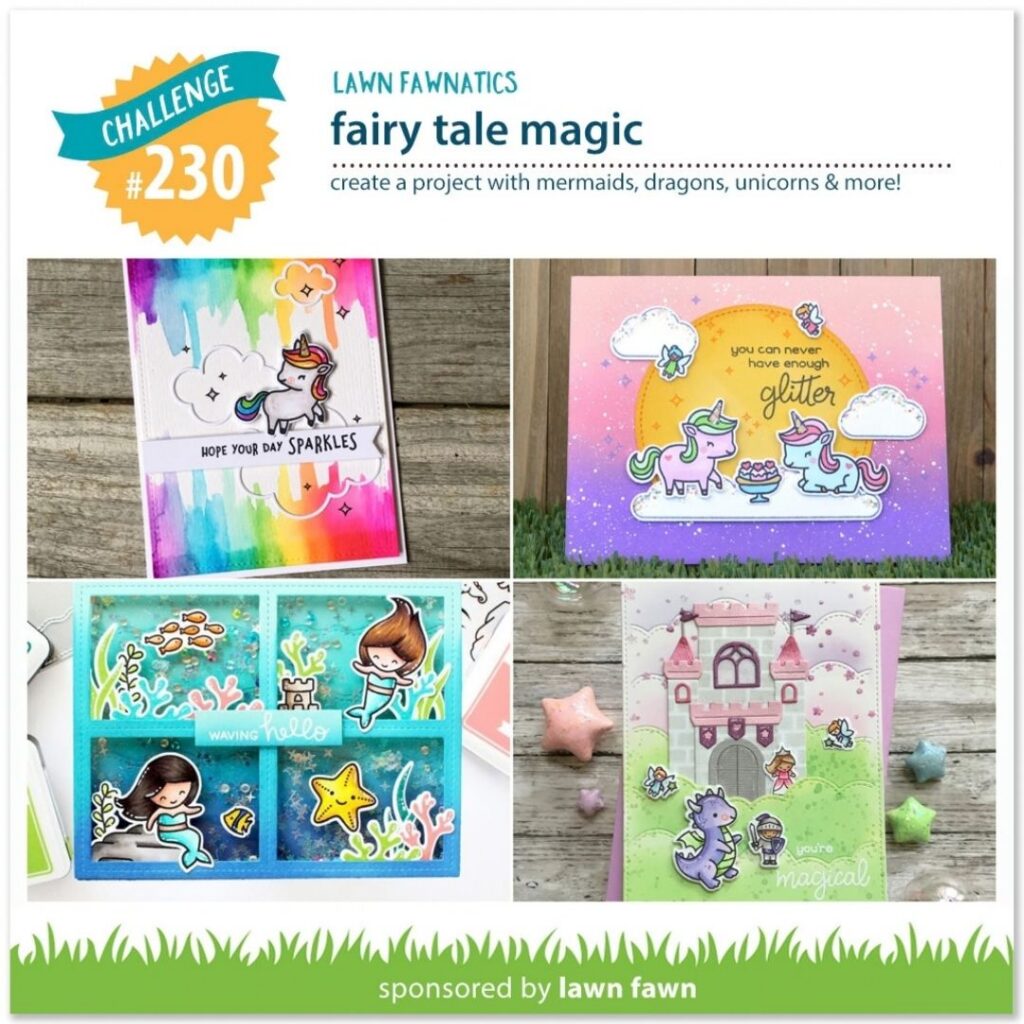
This week, Lawn Fawnatics Challenge #230 is Fairy Tale Magic (as shown below). How can I miss this challenge when Lawn Fawn has been my favourite stamp brand all this time?
The fairies and fairy houses are stamped onto white cardstock and colored using Copic markers. Once done, they are die-cut using the coordinating dies. They are layered with another layer of cardstock to add dimension. This follows Jennifer McGuire's style of creating dimension, which is also good for using up those scraps. The small talk bubbles and 'hi' sentiment are stamped onto white cardstock and hand-trimmed since there are no coordinating dies.

The images are pasted onto the three (3) craft cardstock cards, die-cut with different borders. 

Close-up: Glitter on fairy's wings
The cards are finished by adding some glitter to the fairies' wings and the petals of the fairy house.
Close-up: Glitter on the petals of the fairy house

This card is entering the challenge(s) organized by:

Supplies used:
Stamp used:
1) Lawn Fawn Fairy Friends
2) Lawn Fawn A Birdies Tolds Me (for the small talk bubble)
3) Lawn Fawn Gnome Sweet Gnome (for the sentiment 'hi')

Dies used:
1) Lawn Fawn Fairy Friends Coordinating Dies
2) Unbranded Faux-Stitched Rectangles
3) Unbranded Lace Border Rectangles
4) Unbranded Cross-Stitched Rectangles

Monday, October 05, 2026

Many Hands Hello

Many Hands Hello
Continuing to make my 'hello' and 'hi' cards to help with networking, connections, and people remembering me when I join the new company. I am keeping these cards postcard-style to make storage and distribution easier.

Try a Sketch On Tuesday (TSOT) Challenge #705
For today's cards, I am using the sketch from Try a Sketch On Tuesday (TSOT) Challenge #705, as shown above, where I made three (3) cards with different borders using the same sketch.

The hands image is stamped onto the three (3) die-cut cards with different borders. The image is colored, alternating the colors with different 'hands' in the three (3) images.

Finally, the 'Hello' sentiment is stamped at the bottom of the hands image, as per the sketch. Some color pearls are added to the bottom of the sentiment.

This card is entering the challenge(s) organized by:
1) Try a Sketch On Tuesday (TSOT) Challenge #705 (ends by 11 October 2026)

Supplies used:
Stamp used:
1) Avery Elle Hats Off
2) Unbranded Sentiments (for the sentiment 'hello')

Dies used:
1) Unbranded Faux-Stitched Rectangles
2) Unbranded Lace Border Rectangles
3) Unbranded Cross-Stitched Rectangles

Thursday, October 01, 2026

Tulips Hello

Tulips Hello
It has been a while since I posted any card-making creations, mainly because I rarely make them due to work. When I make them, I just make a simple and quick card, and did not do any posting.

I will join a new company soon, and I am thinking of distributing some 'hello' and 'hi' cards to help with networking, connections, and people remembering me. So I will make some simple cards (no folding) to make storage and distribution easier.

I am adopting the sketch from CAS Colours and Sketches Challenge #595, as shown above, where I made three (3) cards with different borders and colors for the images using the same sketch.


After the tulip images are colored using Copic markers, they are die-cut using the coordinating dies. Then, they are pasted onto the three (3) craft cardstock cards with different borders. The word 'hello' is stamped onto cross-stitched white circles. The circle edges are distressed in matching colors of the tulip images.

This card is entering the challenge(s) organized by:
1) CAS Colours and Sketches Challenge #595 (ends by 12 October 2026)
3) Simon Says Stamp Challenge - Anything Goes (ends by 7 October 2026)

Supplies used:
Stamp used:
1) Pretty Pink Posh Tulips
2) Lawn Fawn A Birdie Told Me ( for the sentiment 'hello')

Dies used:
1) Pretty Pink Posh Tulips Coordinating Dies
2) Unbranded Faux-Stitched Rectangles
3) Unbranded Lace Border Rectangles
4) Unbranded Cross-Stitched Rectangles

Sunday, May 08, 2022

Dandelion Thanks

Dandelion Thanks
Teacher's Day is coming and thus I made some thank you cards.

Freshly Made Sketches #534 - A Sketch by Cécile
I am adopting the sketch from Freshly Made Sketches #534 - A Sketch by Cécile as shown above where I made one horizontal and one vertical card using the same sketch.

Dandelion Thanks - horizontal design (original sketch)
The dandelion image is stamped onto an inverted corner rectangle of white cardstock at the position shown on the sketch.

Dandelion Thanks - vertical design
The word 'thanks' is die-cut from white cardstock and flower background pattern paper. The white die-cut is stacked-up twice and finished off with the pattern paper die-cut. This is following Jennifer McGuire's style of creating dimension which is also good in using up those scraps. The inverted corner panel is attached to the green card base.

Close-up: Sparkled dandelion
The card is finished by adding some glitter to the word 'thanks' and dandelion to make them sparkle and shine.
Close-up: Sparkled 'Thanks'

This card is entering the challenge(s) organized by:
4) CASology - Week #403 - Botanical (ends by 6 June 2022)

Supplies used:
Stamp used:
1) Papercraft Essentials Issue 120 All-occasion Stencil and Stamp Freebies

Dies used:
1) Taylored Expressions (TE) Thanks
2) Unbranded Inverted Corner Rectangles

Sunday, April 24, 2022

Tulip Congrats

Tulip Congrats
Made these congratulations cards for my manager and segment lead who won the AP level recognition recently. I am so proud of them.

Freshly Made Sketch #532 - A Sketch by Kim
I am adopting the sketch from Freshly Made Sketch #532 - A Sketch by Kim. Both the cards will be the same sketch except for the tulip where the colors are changed. and yes, I am into Fusion Card Challenge - Tulips as well where I was inspired by the tulip photo where coincidentally I just bought the Pretty Pink Posh Tulips stamp set recently.
Close-up: The tulip in purple and glitter
The tulips are stamped on the white card stock and colored using Copic markers. They are die-cut using the matching dies. Two (2) more pieces of the matching dies are die-cut from white card stock to be a layer at the bottom to create dimension.

Close-up: Dark purple background
For the panel, a slimline background dies is used to die-cut the dark purple card stock and divided equally in length. They are attached to a cream card base as in the sketch followed by the die-cut tulip.

Close-up: Die-cut sentiment
The sentiment is die-cut onto white and yellow card stocks twice. They are then stacked together to create dimension with the yellow die-cut sentiment on the top layer. The die-cut sentiments are attached to the dark purple background panel.

Close-up: The tulip in red and glitter
The card is finished by adding some glitter onto the tulip itself to make it sparkle and shine. Some pink gems are added to the top and bottom edge of the dark purple background panel as well.

This card is entering the challenge(s) organized by:
2) Fusion Card Challenge - Tulips (ends by 25 April 2022)

Supplies used:
Stamps used:
1) Pretty Pink Posh Tulips

Dies used:
1) Unbranded Congrats
2) Unbranded Slimline Frames and Background

Monday, April 04, 2022

Flower in the Mason Jar Mug Welcome Abroad

Flower in the Mason Jar Mug Welcome Abroad
One of my ex-colleague and good friend will be joining the current company I am working for. This means that we are going to be colleagues again after 11 years! In order to celebrate the occasion, I am going to make her a card to commemorate the moment.

Freshly Made Sketch #529 - A Sketch by Jen T
This time, I would like to make a mini slimline card as I have some pattern slimline envelopes that I bought some time ago. The mini slimline card would be 3.3" x 6" to be fitted into the envelope. For the sketch, I am adopting the sketch from Freshly Made Sketch #529 - A Sketch by Jen T as shown above but mirrored it.

Tic Tac Toe Challenge - TTTC155 - I choose flowers, coloring, and green
I also chose flowers, coloring, and green from Tic Tac Toe Challenge - TTTC155 for this card and flower and pattern from Just Add Ink #597 - Choose Two.

The flower in the Mason jar mug image is stamped on the white cross-stitched panel and colored using Copic markers. The edges of the panel are down-toned with some green ink.

Close-up: The leaves border
On a red card base, a dotted pattern paper is attached to the top of it. For the border edge, a leaves border dies is die-cut from green card stock. It is attached to the pattern base as in the sketch in the mirror direction.

Close-up: The sentiment on the banner
The sentiment is stamped onto a green banner and attached to the card on the left bottom using form tape.

Close-up: Shimmering flower and water
The card is finished by adding some glitter onto the main flower focal, and water to make them sparkle and shine.

This card is entering the challenge(s) organized by:
2) Try It on Tuesday - Say It With Flowers (ends by 5 April 2022)
3) Just Add Ink #597 - Choose Two - I choose flower and pattern (ends by 6 April 2022)
4) Tic Tac Toe Challenge - TTTC155 - I choose flowers, coloring, and green (ends by 7 April 2022)

Supplies used:
Stamps used:
1) Apple Blossom Fabulous Florals
2) Papertry Ink (PTI) 3024 Watercooler Talk

Dies used:
1) Unbranded Cross-Stitched Rectangles
2) Unbranded Leaves Border
3) Lawn Fawn Stitched Journaling Card

Sunday, February 13, 2022

Cupcake Wishing You the Best Birthday Ever!

Cupcake Wishing You the Best Birthday Ever! 
Initially, I plan to make some thank you or hello cards as I do not have these on my stash. But after seeing the Fusion Card Challenge - Valentine Cupcake challenge, I decided to use my long forgotten cupcake image. However, instead of Valentine's, I prefer birthday sentiment since tomorrow will be Valentine's Day and I do not need one now.
Fusion Card Challenge - Valentine Cupcake

Cupcake Wishing You the Best Birthday Ever! - Original Sketch 
First, stitched circles are die cut from white cards stock and stamped with the cupcake image. They are then colored using Copic markers.

Close-up: The sentiment - mirror sketch
Two (2) strips are trimmed from yellow cards stock for the sentiment. Four (4) thin strips are trimmed from dark purple leftover card stock. The sentiment stamped onto the yellow strips with one on the far left and another on the far right. When assembled, these cards will mirror each other. The yellow strips are attached to a blue and red card base. The purple stripes are attached above and below the yellow stripe to make it stand out.

Cupcake Wishing You the Best Birthday Ever! - Mirror Sketch
The cupcake images are attached to the card base as in the sketch, with one as original position as a sketch and another one as the mirror image. They are attached to the card base using foam for some dimensional instead of a flat card.

Close-up: The glitter on the hearts topping - original sketch
Finally, some glitters are applied to the hearts topping as no birthday should be celebrated without glitter, right? :)
Close-up: The glitter on the hearts topping - mirror sketch

This card is entering the challenge(s) organized by:
1) Fusion Card Challenge - Valentine Cupcake (ends by 16 February 2022)
2) Seize the Birthday #231 - Sparkle and Shine (ends by 15 February 2022)
4) Tic Tac Toe Challenge - TTTC148 - I choose heart, free, and stitching  (ends by 17 February 2022)
Supplies used:
Stamps used:
1) Hero Arts CG151 Happy Birthday Cupcakes
2) My Creative Time Wow So Many Candles

Dies used:
1) Unbranded Stitched Circles

Friday, November 26, 2021

Narwhal Waving Hello

Narwhal Waving Hello
Keep making these postcard-style cards for my colleagues and this time considering for male colleagues.

Freshly Made Sketch #513 - A Sketch by Jen B
Freshly Made Sketch #513 - A Sketch by Jen B is the sketch I based on while making these cards. This time, I mirror the sketch horizontally to get two different looks.

Narwhal Waving Hello - Original Sketch
Again, for standardization and making these postcard-style cards like a series, two (2) lace border rectangles are die-cut from kraft cardstock and the second layer is two (2) white cross-stitched rectangles. I also adopt the theme from The House That Stamps Built - Theme Challenge N2421 - Black, White + One Other Color where the other color is kraft or brown.

Narwhal Waving Hello - Mirror Sketch
The narwhal image is stamped on the white cardstock and colored using Copic markers. Then, it is die-cut using coordinating dies. Following Jennifer McGuire's style of creating dimension, a few more coordinating die-cuts are cut from white cardstock to build up the layers. Two (2) blank narwhal coordinating dies are attached together before finally attaching the narwhal image.

Close-up: Narwhal, houndstooth check strip, and sentiment - original sketch
Following Cardz 4 Guys Challenge - #284 Gingham, Checks or Plaid, a strip of houndstooth check is trimmed and attached to the white cross-stitched panel as the sketch is in the original position and another in mirror position. The sentiment is stamped accordingly.

Close-up: Narwhal, houndstooth check strip, and sentiment - mirror sketch
The white cross-stitched panel is then attached to the kraft lace border base. Finally, the narwhal is attached to the houndstooth check strip as in the sketch.

This card is entering the challenge(s) organized by:
1) Freshly Made Sketch #513 - A Sketch by Jen B (ends by 29 November 2021)

Supplies used:
Stamps used:
1) Lawn Fawn Mermaid for You

Dies used:
1) Lawn Fawn Mermaid for You Coordinating Dies
2) Unbranded Lace Border Rectangles
3) Unbranded Cross-Stitched Rectangles