Showing posts with label Bookmark and Tag. Show all posts

Sunday, June 26, 2016

Butterfly Just Wanted to Say Thank You for Your Purchase

Butterfly Just Wanted to Say Thank You for Your Purchase
Made this card for another of my first time Copic markers buyers who uses Copic markers in her arts. I would say as a first timer ordering with me, she is generous on her order as she bought a lot in one order.

Retrosketches #219
I am adopting the sketch from Retrosketches #219 as shown above which is perfect for Tag You're It Challenge #50 too as shown below. Somehow, I did not realize that Retrosketches #219 already over until I almost finished my card. :( Thus, I am playing with Retrosketches #219 sketch without entering the challenge.
Tag You're It Challenge #50

Close-up: The tags
First, a white tag is die cut follow by the pattern paper tag. On the white tag, the flower is stamped at the bottom of the tag and colored using Copic markers. The white area above the flower is distressed using distress ink to mimic sky. The butterfly is stamped and colored using Copic markers as well before it is die cut using matching dies. Both of the tags are attached together with the pattern paper tag behind the flower tag. Then, the butterfly is attach onto the flower tag using dimension tape. Some white and red twine is tied to the tag.

Close-up: The sentiment
On a yellow card base, a washi tape with white dots and red background is layered across the card base as in sketch. Then, the sentiment is stamped onto the top corner as in sketch. The words 'Thank You' is colored using Copic marker.

Close-up: The shimmer on the butterfly wings
The tags are attached to the card base as in sketch. As final touch, some shimmers are added to the wings of the butterfly as well as the 'Thank You' wording.

Dimension: 10.1cm x 15.2cm or 4" x 6"
Type: Vertical fold
Inlay: None

This card is entering the challenge(s) organized by:
1) Tag You're It Challenge #50 (ends by 6 July 2016)
2) Addicted to CAS - Challenge #91 - Fly (ends by 08 July 2016)

Supplies used:
Copic markers used: BG05, BG09, RV17, RV25, RV29, V17 and Y13

Thursday, April 07, 2016

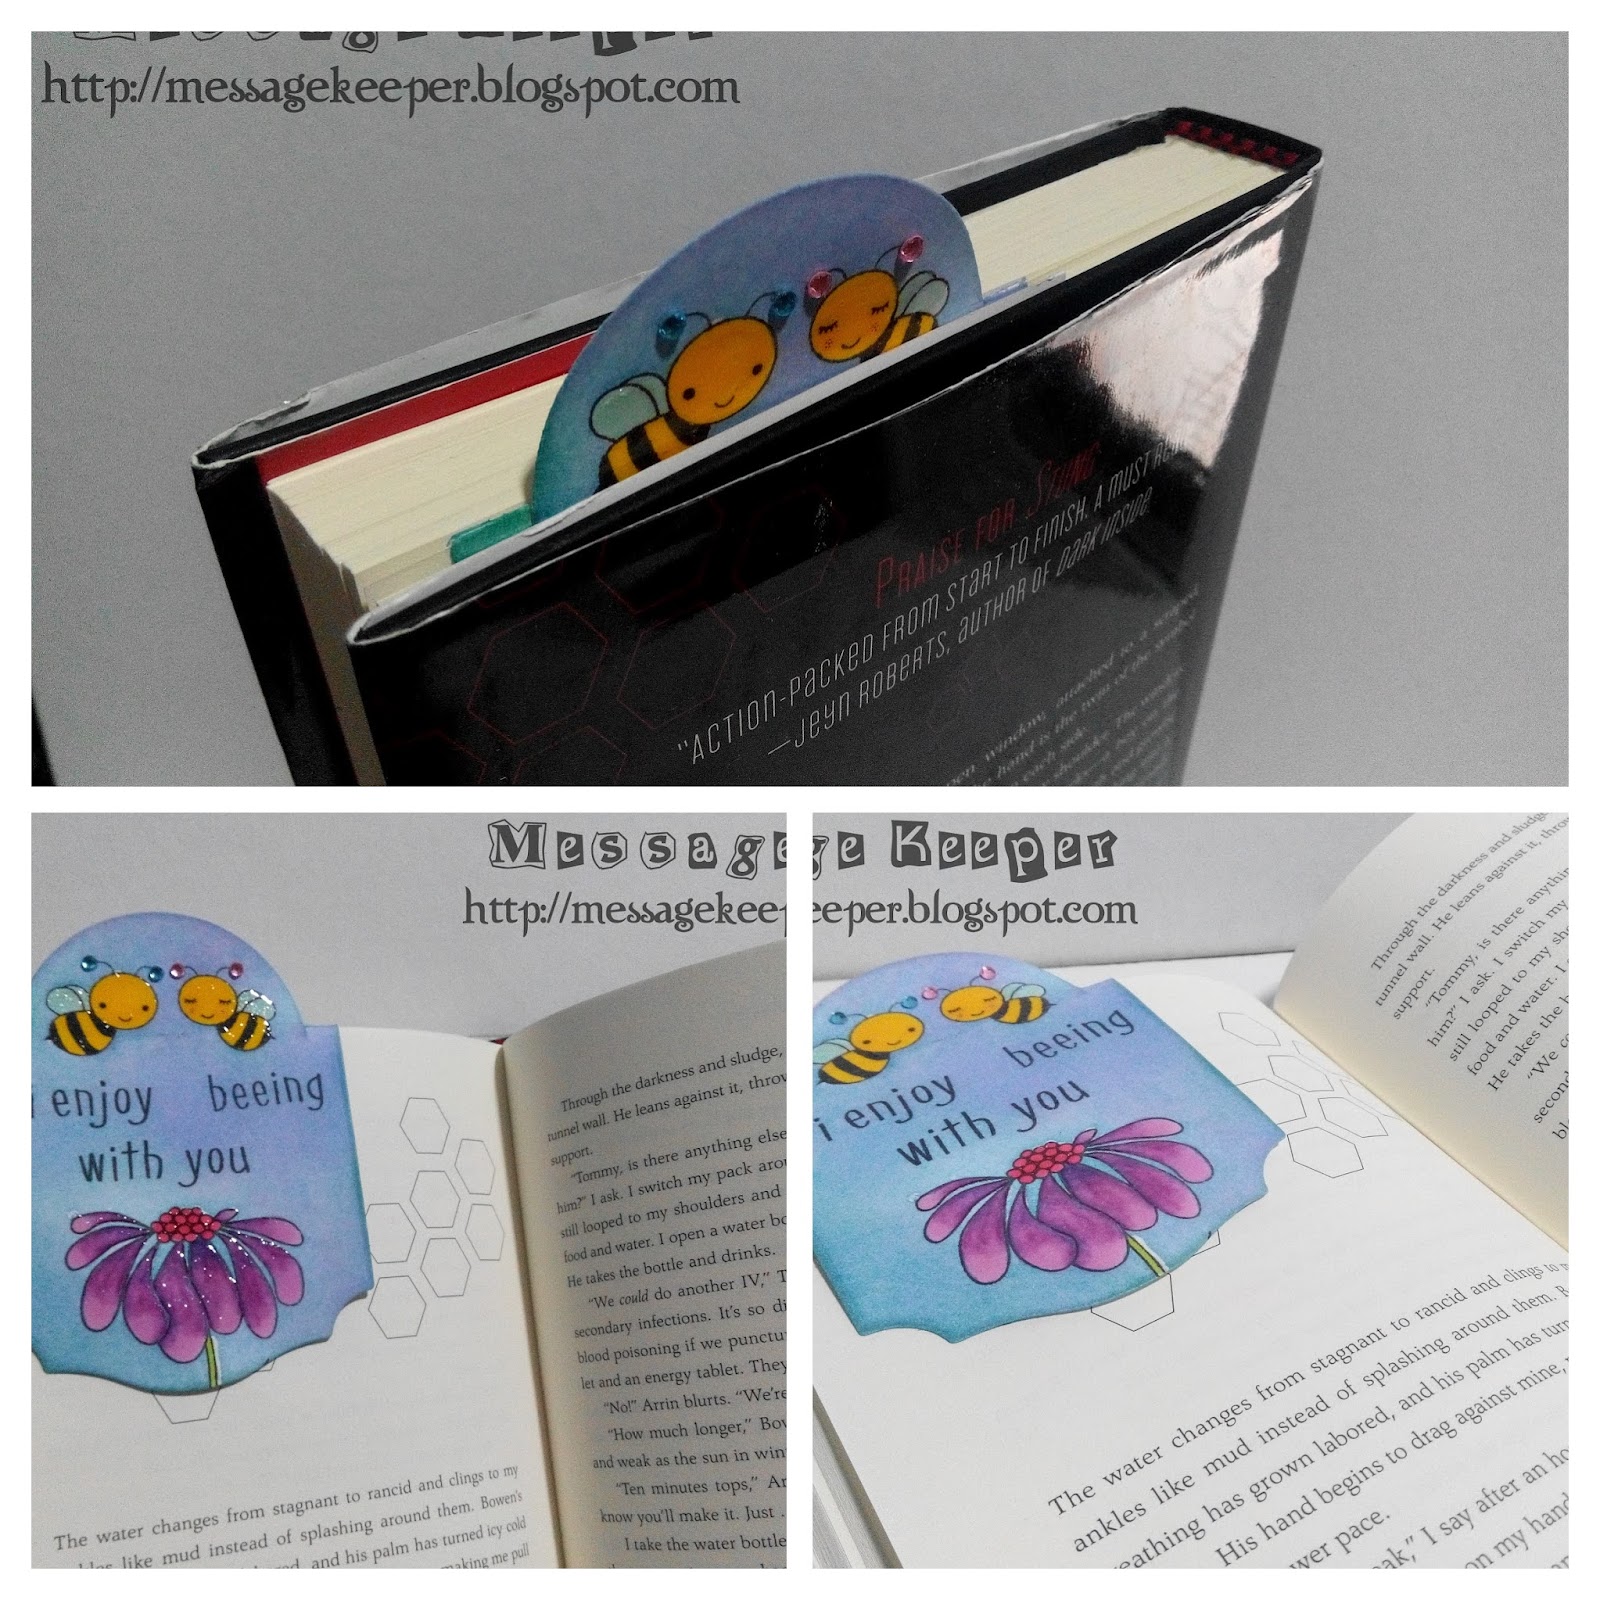
I Enjoy Beeing With You Bookmark for Stung by Bethany Wiggins

I Enjoy Beeing With You Bookmark
I kind of made a promise to myself that I would make a bookmark that corresponded to the books I am reading in this post but I never have that kind of time. :(

Left: I Enjoy Beeing With You Bookmark - Side Front View
Right: I Enjoy Beeing With You Bookmark - Side Back View
But today, I am so eager to make this bookmark as I am currently reading Stung by Bethany Wiggins and I love the story so much! As spring is in the air now in another part of the world, it is just a great idea to make a happy and fun bookmark with flower and things with wings!

Close-up: Half circle using Jennifer Mcguire's on-the-edge die cutting technique 
I wanted to try Jennifer Mcguire's on-the-edge die cutting technique which is perfect as the bookmark 'header' that pop out from the book marking where I stop my reading. Thus, first, I measure the half circle where it fits my bees placement and the shape for my bookmark. Then, I stamp the bee and flower images accordingly and colored using Copic markers.

Close-up: Modified sentiment
As for the sentiment, I want to incorporate punny wording of 'bee' as this book is after all related to bee. Thus, I modified the original sentiment of 'I Enjoy Being With You' to 'I Enjoy Beeing With You' by cutting the long sentiment apart and extra stamp the letter 'e'.

Then, I die cut the half circle using Jennifer Mcguire's on-the-edge die cutting technique follow by the shape for the bookmark. However, I realize I make a mistake as there is a impression on the half circle where the folded line is. I should instead cut the shape of the bookmark first then only cut the half circle or slit the half circle die cut in front of the shape die so that it would not leave an impression. Maybe I try that in the next bookmark that I want to make.

Close-up: Flower at the bottom of the shaped bookmark
I also would like to incorporate Jennifer Mcguire's masking alternative using glossy accents technique as I want to make the background in sky colors. Before I apply a good coat of glossy accents to the bee and flower images, I apply some sparkle to the bees' wings to give imaginary idea that they are flying. After the glossy accents dried completely, I apply good amount of inks to mimic the sky. I must admit that some of the not-meant-to-be-glossy-accents-areas are not really spot-free from glossy accents like the flower stem. But I am happy with the result as this is my first try and attempt.

This is how it looks like when inserted into the book
For the final touch, two (2) blue gems are attached to the male bees' antenna and two (2) pink gems are attached to the female bees' antenna. Finally, magnetic strips are attached to the inside of the bookmark to create a magnetic bookmark.


This card is entering the challenge(s) organized by:
1) Lawnscaping Challenge 127 - Beautiful Florals (ends by 13 April 2016)
2) MarkerPop Coloring Challenge #92 - Spring (ends by 17 April 2016)
3) Creative Card Crew - Challenge 110 - Die Cut (ends by 18 April 2016)

Stamps and tools used :
Copic marker used : B00, R20, RV25, V06, V12, V17, Y18, Y19 and YG03

Monday, March 07, 2016

Birdies Wedding Congratulations

Birdies Wedding Congratulations
Made this wedding wishes card for an ex Malay colleague who is getting married this Saturday. Her wedding reception is in Penang and I could not make it. Thus, I made her this card which I pass to another colleague who is going.


Close-up: The tag, birdies, sentiment and embellishment
The birdies are stamped, colored using Copic markers and die cut using the matching dies. On a pink card base, a border is made using washi tape that have hearts pattern which is just perfect for the occasion.


The wedding invitation
A doily is layered onto the center of the card base as in sketch. The use of doily is inspired by the wedding invitation itself as shown above.

A yellow tag is die cut and tied with a red ribbon. It is layered onto the doily as in sketch using dimensional tape. The birdies are layered onto the tag using dimensional tape as well.


Close-up: Gold embossed sentiment
The sentiment is stamped on a neon pink strip and emboss using gold embossing powder. The strip is fish-tailed at two (2) ends and layered onto the yellow tag using dimensional tape.


Close-up: Shimmer on the birdies' glasses
Finally, some red heart shaped pearls follow by a bigger red heart gem are attached above the birdies to mimic they are in love. Some shimmer is added to the glasses of the birdies.

Dimension : 10.16cm x 15.24cm or 4" x 6"
Type : Top fold
Inlay : None

This card is entering the challenge(s) organized by:
1) Sketch Saturday Week #402 (ends by 11 March 2016)
2) AAA Cards - Game #59 Embossing (ends by 12 March 2016)
3) Catch the Bug Challenge Blog - March - Anything Goes (ends by 12 March 2016)

Supplies used:
Copic markers used: B02, B04, BG01, RV14, RV17, RV23 and Y35


Sunday, December 06, 2015

Reindeer Merry Christmas Ornament

Reindeer Merry Christmas Ornament
With this Christmas ornament, I have hit my 2015 Christmas cards/projects target which is five (5) in total! Well, I know the quantity is small but at least I made my target. I will try harder next year!

I am making this Christmas ornament to be put in one of my office team Christmas tree which is on top of a her desk. I do not think it is not really the team Christmas tree as as far as I know no one sponsor for it. It is rather a personal interest to make up the festive feel in the office as we spend so many hours in office nowadays. I would like to make a small contribution to the Christmas tree as well to send my wishes to others. Thus, I made this Christmas ornament.

I guess it would be fun to make a shaker Christmas ornament as handmade things are very rare found and see in Malaysia. Thus, I guess a shaker Christmas ornament would make it more appreciated and noticeable.


Close-up: Adding shimmer before the shaker Christmas ornament is assembly
I use a digital stamp that come with both the image and sentiment which is printed and die cut into circle. Both of them are colored using Copic markers. I also outline the images with blue marker to make it pop on the white background. After coloring, I add shimmer to the reindeer's nose and the banner which really show those festive feeling!

Then, the supplies for shaker Christmas ornament are die cut and assemble accordingly. I double up the foam so that there are more rooms for the beads to move around.

This card is entering the challenge(s) organized by:
1) Just Us Girls JUGS - Word Week #322 - Merry (ends by 10 December 2015)
4) Natalie and Amy's Challenge - #39 Christmas (ends by 28 December 2015)

Supplies used:
Copic markers used: B00, E11, E13, E21, E23, E35, E37, E50 and R29

Saturday, October 17, 2015

Be Merry Santa Tag

Be Merry Santa Tag
I think it is time to start on some Christmas projects or I will have nothing when comes to Christmas! For starter, I made this tag. :P

Tag You're It Challenge #32
This tag was inspired by the Tag You're It Challenge #32 as shown above.

I use digital stamp as I do not have any Santa Claus image in my collection. The Santa Claus image is printed and die cut into a tag, obviously since it is inspired by the Tag You're It Challenge. Then, it is colored using Copic markers.
Close-up: The Santa Claus
Another green tag is die cut and stamp with background stamp. This green tag is then layered behind the Santa Claus tag. The reasons being are one, to cover-up the bleed of the Copic markers and second, to give some special to the tag.
Close-up: Sentiment on the green fish tailed banner
For the sentiment, I stamp it onto a small fish tailed banner. Using the ring enforcer die, I die cut a hole onto the green banner so that the banner can be layered on top of the Santa Claus tag.

Close-up: Glitters on the Santa Claus' clothing and light bulbs
The tag is finished off with adding some glitter to the white areas of the Santa Claus' clothing and the light bulbs. I also try to outline the image as suggested by Kathy Racoosin on her blog here and it really makes a difference. The image is more focus and pop! Finally, a red and green checked ribbon is tied to the tag's hole.

This card is entering the challenge(s) organized by:
1) Tag You're It Challenge #32 (ends by 21 October 2015)

Supplies used:
Copic markers used: B00, B04, E21, R29, R35, R46, T7, YG13 and YR16

Wednesday, October 14, 2015

Many Thanks (Recycling Material from Previous Project)

Many Thanks
As mentioned in my previous post, I had some die cuts of stenciled pattern circles which leftover from the previous project. Today, I decided to use these leftovers before they get tucked somewhere on my desk and I forgotten about them.

Close-up: Punched border on the right side
I started off the card with some punched borders as inspired by Papertake Weekly Challenge - Two by Two whereby I will layer both left and right side with punched borders. Before I attach the punched borders to the card base, I layer a piece of pattern paper first as shown in the sketch.

Close-up: Mini doily with stenciled pattern circle and sentiment
A tag with fish tailed end is die cut and attach onto the pattern paper as shown in sketch. The mini doily circle is die cut and the leftover of stenciled pattern circles from the previous project is attached onto it. The mini doily circle is later attached onto the tag covering the tag hole.

The sentiment is stamped on a green fish tailed banner. It is attach onto the card using dimension foam to give some dimension to the card.

Dimension : 10.1cm x 15.2cm or 4" x 6"
Type : Horizontal fold
Inlay : No

This card is entering the challenge(s) organized by:
2) Papertake Weekly Challenge - Two by Two (ends by 19 October 2015)
3) Lawnscaping Challenge 115 - Sentiments (ends by 14 October 2015)

Supplies used:

Tuesday, January 20, 2015

Wish Big.....

Wish Big.....
Made this birthday card for my colleague whom I promised earlier. Her birthday is on this Thursday.

Retrosketches #149
I adopt the simple sketch from Retrosketches #149 as shown above as I want to make a quick and simple card.

Close-up: Flower background
First, I stamp the flower repetitively onto a white card stock in pink so that it would be the background or own made pattern paper. Then, I purposely made a tear to the upper left corner as the sketch inspired me to have such idea! Then, the flower background is attached onto a pink card stock.

Close-up: Scalloped square tag
A rounded corners yellow square is stamped with the sentiment and attached with foam tape onto a green scalloped square die cut. At the left corner slit of the green scalloped square die cut, a gold ribbon is tied to it as in the sketch. Then, it is attached onto the pink card base using foam tape as in the sketch.

Dimension : 10.16cm x 15.24cm or 4" x 6"
Type : Vertical fold
Inlay : None

This card is entering the challenge(s) organized by :
1) Retrosketches #149 (ends by 23 January 2015)

Stamps and tools used :

Saturday, December 20, 2014

Merry Kissmoose Door Hanger

Merry Kissmoose Door Hanger
Well, to have that Christmas feeling is not enough by just one door hanger, right? So, I made another Christmas door hanger for my son's room. This time, I made a little cuter and more kiddy look since my son is just three (3) years plus old. 


Close-up: Moose with Christmas hat

The moose is stamped on a white circle. A Christmas hat is added to its head to make it more Christmas feel. The images are colored using Copic markers. Then, the edges of the circle is distressed to tone down the whiteness. It is attached onto a yellow scalloped circle. Two (2) giggle eyes are added to the moose and one white gem is added to the hat to make it a bit sparkle.


Close-up: Sentiment
The sentiment is stamped on a tiny die cut fishtail yellow banner but on the reverse direction from the previous. The mistletoe is created using the same way.

For my son's door hanger, I die cut a light blue tag and trimmed away the right side of the hanging hole. The scalloped circle is attached to the door hanger follow by the sentiment banner in which I use foam tape too so that it will have some dimension.

This door hanger is entering the challenge(s) organized by :
1) Lawnscaping Challenge 96 - Merry Christmas (ends by 24 December 2014)
2) Crazy for CAS - Challenge #60 Anything Goes (ends by 02 January 2015)

Stamps and tools used :
Copic marker used : E08, E13, E25, E27, E29 and R27

Wishing You a Merry Christmas Door Hanger

Wishing You a Merry Christmas Door Hanger
Although I am not celebrating Christmas, I like the Christmas feel in my house. That feeling is lacking in my house now. Thus, to have that feeling, I made a Christmas door hanger for my daughter's room. I bet she will like it when she wakes up tomorrow morning.


Close-up: Image
I use Socking Santa Ornament from Bugaboo Digi Stamp (which is freebies for December 2014) for this door hanger. After it is printed and die cut onto a circle, it is colored using Copic markers. Then, the edges of the circle is distressed with ink to tone down the whiteness. It is attached onto a green scalloped circle.


Close-up: Sentiment
The sentiment is stamped on a tiny die cut fishtail yellow banner. On the fishtail end, two (2) mistletoe leaves are stamped according to the banner end and colored using Copic marker. I decided to use red gems as the berries which add some dimension and a tiny sparkle.

I use the Papertrey Ink (PTI) Wine Bottle Tag Die (that I bought some time ago) to make into a door hanger. Finally, my theory is proven after eight (8) months of having this Papertrey Ink (PTI) Wine Bottle Tag Die on hands! The wine bottle tag can be easily turned into a door hanger by trimming away the left or right side of the hanging hole!

For my daughter's door hanger, I die cut an orange tag and trimmed away the left side of the hanging hole. The scalloped circle is attached to the door hanger follow by the sentiment banner in which I use foam tape so that it will have some dimension.

This door hanger is entering the challenge(s) organized by :
1) Lawnscaping Challenge 96 - Merry Christmas (ends by 24 December 2014)

Stamps and tools used :
Copic marker used : B05, E21, E50, E53, G17, R24, R27, R29, YG06 and YR15


Thursday, December 11, 2014

Wishing You a Warm & Wonderful Christmas Tags

Wishing You a Warm & Wonderful Christmas Tags
Made these tags for my colleague's kids whose I promised early of the year that I will make a Christmas card for her as she likes my works. Frankly speaking, I really do not have much time to make cards this year due to my day job. Thus, I will take one of the Christmas card I made last year for her instead and include these fresh made tags. I hope her kids like this Christmas tags.

Close-up: Wishing You a Warm & Wonderful Christmas Tag #1
First of all, those warm clothing images such as hat, scarf, mitten and earmuff are stamped on a piece of white card stock and colored using Copic markers. Then, they are die cut using the matching dies.

Close-up: Wishing You a Warm & Wonderful Christmas Tag #2
As for the tags, several different colors card stock are die cut. After pairing up the colors, one of the tag in the pair is stamped with a sentiment border using gold ink all over the tag. This stamped tag is later trimmed whereby the upper and bottom are the concern parts. These upper and bottom parts are punch using border punch.

Close-up: Wishing You a Warm & Wonderful Christmas Tag #3
On the other tag in the pair, the sentiment is stamped on the center of the tag. The punched upper and bottom part of the tag is attached accordingly to the other tag. Then, the tag is 'accessorizes' with the hat, scarf, mitten and earmuff using foam tape.

Close-up: Wishing You a Warm & Wonderful Christmas Tag #4
Finally, a silver ribbon is tied to the tag as finishing touch!

This card is entering the challenge(s) organized by :

Stamps and tools used :
Copic marker used : B00, B02, B05, BG23, E11, E13, E33, R20, R22, R24, RV04, V04, V09, Y17, YR02, YR07 and YR15

Sunday, November 16, 2014

Have A Happy Heart Corner Bookmark

Have A Happy Heart Corner Bookmark
Testing one of my new toys bought previous, the Simon Says Stamp Bookmark It! craft dies by making this little corner bookmark.

I die cut the corner bookmark and then fold it accordingly to the line. Then, the opening is sealed to form a pocket or slit insert.

On a white circle, I stamped the circle image that bundle together with the sentiment. As I am reading a love story book currently, I would like to have a kind of matching bookmark to go with the book. Actually I plan to have different kind of bookmark for the books that I will read. Hopefully I can make more bookmark soon.

I colored the heart in the center of the stamped image and dot the dots with the silver ink pen so that there is some sparkles on it. After all, love is about sparkle, right? :P I also add some faux stitching line along the outer circle of the image using purple ink pen so that it is a bit colorful.

The circle is then attached onto the corner bookmark. Another white blank circle is attach to the back of the circle so that the corner bookmark is now sandwiched between the white circles.

This card is entering the challenge(s) organized by :
1) Natalie and Amy's Challenge - #26 Stitch It! (ends by 29 November 2014)

Stamps and tools used :
Copic marker used : R24, R27 and R29

Monday, November 03, 2014

Bunny Just Wanted to Say Thank You for Your Purchase

Bunny Just Wanted to Say Thank You for Your Purchase
Made this card for another of my first time Copic markers buyers who uses Copic markers in his arts.

I decided to use a tag as the main focal as suggest in the sketch. The bunny is stamped on a white rounded corners rectangular and colored using Copic markers. It is attached onto a yellow tag using pop dots. The tag is completed with the grey and blue twines and two (2) googly eyes.
Close-up: The tag
On a green card base, some various 'masking stickers' patterns are attached onto the top portion of the card base in zig zag way. The tag is attached directly onto these 'masking stickers'.

Close-up: Sentiment with silver glitter ink
The sentiment is stamped at the right corner bottom of the card base. Again, the space in the word 'Thank You' is filled or colored with silver glitter ink to emphasis it.

Dimension : 10.16cm x 15.24cm or 4" x 6"
Type : Vertical fold
Inlay : None

If you would like to have a similar design of these items or individual item, please fill up the custom order form here. Please do include the color or theme you prefer, purpose of the item(s) (farewell, retirement, birthday and etc) and message (if any).

This card is entering the challenge(s) organized by :
3) Addicted to CAS - Challenge #51 - Tag (ends by 15 November 2014)

Stamps and tools used :
Copic markers : E50, E53 and R20